Showing posts with label nuts. Show all posts

Monday, January 08, 2024

Crunchy Stuff

I stumbled upon SAUCE UP Almond Crunch Sauce while perusing Amazon for chili crisp. Like chili crisp, it's a sweet and oily combination of fried alliums and chiles, but also contains chopped almonds and a bit of dried thyme. It's different and delicious and adds a whole 'nother level of texture to dinner. But as much as I like this product, this post isn't going to exhort you to buy it. It's going to encourage you to make your own

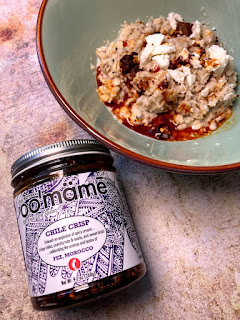
What I've been doing is to finish most of the jar, then add my own nuts, seasonings, and oil to extend the product. This stuff comes in handy when I have a dinner planned that might be somewhat lacking in texture variety, perhaps braised chicken with rice or potatoes and green beans. Thought it might be perfectly tasty, there's nothing exciting texture-wise in that dish. It needs a little crunch to zhuzh it up, give it a little spark. Sometimes I'll make up a type of dukkah, a dry blend of spices and nuts that originated in Egypt. And other times, I want something a bit oilier.

I keep a variety of both raw and roasted nuts in the freezer. Some nuts, like hazelnuts, go rancid in a ridiculously quick amount of time. Others I just don't consume fast enough. Freezing keeps them fresher for a much longer stretch of time. I may grab a couple ounces of roasted almonds or sunflower seeds which I toss into a sandwich bag and bash into smaller pieces with a meat tenderizer. These go into the mostly empty sauce jar along with a pinch of kosher salt and a glug of olive oil. Depending on the flavors of my meal, I might stir in a pinch of za'atar and toasted sesame seeds, or curry powder and nigella seeds, or toasted fennel seeds and dried oregano. For heat, I like adding a bit of Urfa Biber (a Turkish dark burgundy chile flake with a somewhat smoky flavor) or Aleppo pepper. I stir and taste and reseason, and when it tastes good, I put the jar in the fridge. (I always keep my jar in the fridge, so the nuts and oil stay in a cool and dark place, to stave off rancidity.) 

Recently, I decided to use TJ's Gluten-free Battered Plant-based Fish Fillets in tacos. Honestly, I find the average fish taco to be incredibly boring, so I would never order one in a restaurant. Battered fish (or vegan fish) is bland. Tortillas--especially commercial ones--are bland. Slaw might be vinegary, but raw cabbage is boring. Basically, the usual mayonnaise-based (more blandness) topping is left to do all the heavy lifting, flavor-wise, and it doesn't do a particularly good job of it. At least there's a bit of texture going on with the cabbage and hopefully the fish batter doesn't go completely soggy before being consumed. To me, what this dish needs to be more appetizing is a sauce that is both crunchy and spicy. An almond crunch sauce with a Mexican vibe.  I combined a little olive oil, a pinch of salt, and a goodly amount of Tapatio Picante Seasoning with freshly toasted and cooled pumpkin seeds (a small handful) and cumin seeds (1/4 teaspoon-ish) to make a textural condiment that added just the right amount of extra pizazz to dinner.

Need more than a rough guideline? Here's a "recipe." If you try it, or something like it, do let me know in the comments.

Homemade Savory Nut Crunch

About 4 ounces of your favorite nut(s) and/or seed(s), which may include: roasted and unsalted almonds, peanuts, hazelnuts, walnuts, pecans, cashews, pumpkin seeds, sunflower seeds, hemp seeds, and sesame seeds, broken into pieces roughly 1/4" - 1/8"

Enough neutral oil or good olive oil to moisten the mixture without making it liquidy, a tablespoon or so

A pinch or more to taste of dry herbs and savory spices of your choice, such as thyme, oregano, za'atar, fennel seeds, cumin seeds, curry powder, jerk seasoning, nigella seeds, etc.

A pinch of kosher salt

Pepper flakes, such as Urfa Biber, Aleppo, gochugaru, Ancho, etc. (optional)

Combine everything in a bowl, stir and taste. Add more of anything or everything depending if it's too dry or not salty enough. You could also add a tiny bit of sweetener (sugar, honey, maple syrup) - a quarter teaspoon or so, if it seems appropriate. Garlic or onion powder would also not be out of place here, though I don't tend to add either. 

Store in a covered container in the fridge. 

* Any products in this post that are mentioned by name may have been provided to Minxeats by the manufacturer. However, all opinions belong to Minxeats. Amazon links earn me $! Please buy!

Posted on Minxeats.com.

Monday, August 29, 2022

Charcuterie Platters


Who, except vegans, doesn't appreciate a good charcuterie platter?

It's a perfect lazy meal, and fantastic for those sultry summer evenings when the thought of hot food is unappetizing. And I'm not the only one who thinks that. Not only do more and more restaurants offer assortments of meats and cheeses, I've noticed that some entrepreneurial folks are starting businesses that revolve around creating and selling attractive charcuterie platters. A small amount of decoratively arranged salumi (the Italian term for cured meats) and brie adorned with a sliced strawberry and six almonds can sell for $30-$40. At that price, you're better off going to a restaurant. But make one at home, instead.

Sure, the initial outlay for homemade salumi suppers might be a little spendy, but a $6 jar of cornichons will last through multiple platters, as will boxes of crackers, jars of jam, and bags of nuts. Columbus brand salami and capicola, or similar, in 5-oz packages, run $6-7 in grocery stores. The meats seem expensive, and they kinda are compared to others sold by the pound. Keep in mind that cured meats are fatty and salty and rich, so one only need eat a few slices. Particularly if there are also some even more-fatty cheeses at the party. The last time we had a charcuterie plate for dinner, I purchased two packages of Italian meats, three kinds of cheese, and a jar of cornichons for about $35 and used it for three dinners for 2, with cheese and tiny pickles left over. 

Cheese can also be expensive, so don't go overboard. Buy a couple of your favorites; ideally there should be one soft and one firm or semi-firm, like a brie or goat cheese log and a cheddar or Manchego. If you have more than two diners, buy another cheese for every two people. But expect leftovers. In fact, it's probably best to cut a portion of the cheese off and put it on your platter or board, and stash the rest in the fridge for next time. That way, uneaten cheese doesn't sit out too long, and there's one less thing for you to tidy up afterward, especially if you've been hitting the wine.


You may, of course, enjoy your meats and cheeses with your fingers, but it's much neater to use bread or crackers. Thin slices of crusty bread--toasted or not--are perfect if you are extra fancy and have included a pate in your selection of meats. It's also nice with very soft brie. Otherwise, crackers are the way to go. Use whatever you like. Ritz or Club crackers are just fine, as are water crackers or hell, saltines. I try to eat gluten-free as much as possible and have discovered some truly excellent GF and grain-free crackers, which I will list at the end of the post.

In addition to the three essentials--meat, cheese, and bread-like substance--a good charcuterie platter should include other flavor elements. Olives and cornichons are typical accompaniments, but one needs other items to balance out the salt. I like to add sweet things, like a fruit spread or jam, and fresh or dried fruit, including grapes, figs, and mini tomatoes. Nuts, preferably unsalted, add extra crunch. Mustards are nice, as are roasted red peppers, pepperoncini--honestly, whatever suits your fancy. You may choose to arrange items artistically on a platter or board (I use a large bamboo cutting board), or simply place items randomly. For hard or medium-firm cheeses, I like to cut them into serving size cubes or wedges. I put soft cheese like brie or chevre on the board in one large chunk and supply a separate spreader for each type of cheese. Toothpicks are nice for picking up individual cubes of cheese, especially when there are more than two diners, but fingers are fine otherwise.

I enjoy charcuterie boards so much, I've made them for Thanksgiving dinner. As in, the entire Thanksgiving dinner was one big, coffee-table-sized, spread. Lest you think I jest, see below (ignore my reading glasses in the lower right).


It was perfect for three of us to nibble on for the entire day while we watched football and drank copiously. We did this three years in a row, until my brother determined that it was mildly sacrilegious not to have hot poultry on Thanksgiving. So last year I made chicken legs and roasted brussels sprouts to follow a much-scaled-down selection of meat and cheese. I plan to do the same this year.

------------------------------
Most of these fine gluten-free and grain-free crackers I've discovered via the Specialty Food Association's annual Summer Fancy Food Show in New York. While grocery stores have better and better selections of food for special diets, it's difficult to stock absolutely everything available, so I have supplied links for ordering the products online.

Simple Mills Almond Flour Crackers - I'm a big fan of these, particularly the Rosemary and Sea Salt variety. They are available in many grocery stores, but can also be purchased online

Hungry Bird Eats Nordic Crisps - incredibly crisp and delicious crackers that I will happily eat out of the box like potato chips. They can be purchased online from their website

Cabin 11 Bakery 5-Seed Grain-Free Crisps are similarly delicious crispbread-like crackers made with 5 seeds. Their website is down currently, and I'm not sure where to buy them. Hopefully they'll be back up and running soon, as I've run out and need more crackers!

Quator Crisps Yuca Chips - I also like using crisp yuca chips with charcuterie platters. Quator Crisps might be a bit too slender to put cheese on top, but they still work great to nibble on the side. They are available in a handful of shops right now, but you can order them from their website.

Nova Crisp - these crispy air-popped cracker/chips are made with cassava and come in a handy bowl shape that makes them perfect for scooping. The rim also holds in runny stuff like mustard or jelly perfectly. They come in a few flavors, but the sea salt is my fave. They are available in stores like Safeway, Aldi, Lidl, H Mart, and Weis Market but also at Amazon.

Lark Fine Foods, which are not gluten-free but still worth mentioning, makes a bunch of tasty cookies and biscuits that are both savory and sweet. Their Pizzetta biscuits work pretty nicely with soft cheeses, especially if you're into the idea of a cookie that tastes like pizza. They are available in gourmet shops, primarily in the eastern US. Igourmet stocks some of their biscuits, and multi-product samplers can be ordered from Williams-Sonoma.


* Any products in this post that are mentioned by name may have been provided to Minxeats by the manufacturer. However, all opinions belong to Minxeats. Amazon links earn me $! Please buy!

Posted on Minxeats.com.

Tuesday, November 02, 2021

Oomame Chile Crisp Ice Cream

Moroccan Oomame on Oatmeal with feta
One of my favorite products discovered at the 2021 Fancy Food Show was Oomame's line of globally-influenced chile crisps. Originally from China, chile crisp has become a popular condiment among chile-heads and others who enjoy a flavorful bit of spice plus crunchy texture. It's great on dumplings, but also pizza, pasta, and just about everything else. What I like about Oomame's product is that it comes in four varieties - a classic Sichuan style, plus others borrowing flavor profiles from Mexico, Morocco, and India. While I still like to use the Sichuan version on typically savory dishes, I have found that the dried fruits in the other varieties (fig in Moroccan, papaya in Indian, mango in Mexican) add a subtle sweetness that makes them also work well with foods that are traditionally sweeter. Try a drizzle of Moroccan Oomame with a sprinkle of feta cheese on your next bowl of oatmeal--rather than the usual brown sugar or maple syrup and fruit--for something totally unexpected and totally delicious. But let's push that proverbial envelope a bit, shall we?

Some ice cream shops in Sichuan province have taken to drizzling chile oil on vanilla soft serve. And while a chile crisp sundae seems like a fine idea, I took it even further by putting chile crisp in ice cream. Yes, I did! The Mexican-inspired version of Oomame Global Chile Crisp, in particular, seemed ripe for taking a savory condiment fully into dessert territory. But rather than using vanilla in my frozen confection, I borrowed some elements from the chile crisp itself to flavor the creamy base. I started with Jeni's ice cream recipe, which uses corn starch and cream cheese in place of eggs as a thickener, and infused it with mango and orange peel, adding peanuts as a substitute for the pepitas in the Mexican Oomame. (While they're great for crunch, I didn't think they'd add all that much flavor.) 

The result exceeded my wildest expectations. Mr Minx wasn't all that thrilled with the flavor of dried onion in his ice cream but it didn't bother me. Nor did the occasional hit of cumin. The predominant flavor was orange peel, even more so than chile, which I thought was enough to keep my creation well within the realm of dessert. If you're an adventurous eater, give it a try. 

I have no regrets.


Oomame Chile Crisp Ice Cream

1 clementine or half a small orange
2 cups milk
1 1⁄4 cups heavy cream
1 ounce dried mango strips
Small handful of roasted unsalted peanuts
4 t cornstarch
2⁄3 cup sugar
2 T light corn syrup
1⁄4 t kosher salt
3 T cream cheese, softened
2 T Oomame Mexican Chile Crisp
Additional roasted unsalted peanuts
Chocolate chips (optional - I used a Seattle Chocolates Mexican Chocolate bar, cut into slivers)

Peel the clementine or orange in large strips, saving the fruit segments for another use. Carefully scrape the white pith from the inside of the peel with a small knife. 

Reserve 1/4 cup of milk and put the remaining 1 3/4 cups plus the cream into a 4-quart saucepan. Add the mango, peanuts, and clementine or orange peel. Over medium-high heat, bring the milk to almost a boil. Turn off the heat, cover the pan, and allow the flavorings to steep for about 20 minutes. 

Stir the cornstarch into the reserved 1/4 cup of milk and set aside. 

Strain the steeped milk into another 4-quart saucepan, reserving the fruit and nuts. Add the sugar, corn syrup, and salt to the pan and bring the milk to a boil over medium-high heat. Cook for 4 minutes, then stir in the slurry. Bring back to a boil and cook until thickened, 2 minutes.

Put the cream cheese in a large bowl and pour in 1/4 of the hot milk, whisking until smooth. Carefully whisk in the rest of the hot milk. Stir in the chile crisp. Pour the milk into a storage container. Add a layer of ice cubes to the bottom of a baking pan large enough to fit the storage container and put the container on top of the ice in order to cool the milk mixture down quickly. After about 15 minutes, put the container in the fridge to chill completely, 4 hours or overnight.

Cut the steeped mango and orange peel into small pieces and reserve along with the peanuts.

Put the chilled ice cream base into the bowl of an ice cream maker and process according to manufacturer's directions. After the ice cream has started to thicken and is almost done, add the mango, orange, peanuts, and chocolate, if using. Scoop ice cream into a freezer-safe storage container (I just used the same one I used for the hot milk) and smooth with the back of a spoon. Cover and freeze until firm, at least 4 hours.

Serve with additional chile crisp, or over your favorite brownies. Or eat straight out of the container.


* Any products in this post that are mentioned by name may have been provided to Minxeats by the manufacturer. However, all opinions belong to Minxeats. Amazon links earn me $! Please buy!

Posted on Minxeats.com.

Monday, September 02, 2019

Wholesome Pantry Snacks

I've really tried to be good this summer, eating whole foods and skipping things like sugar and grains, eating way more fruit and veg, and laying off the meat. Many people who do this go on forever about how good they feel, how well they sleep, poop, etc., because they're living this new somehow more perfect lifestyle. I won't. I feel as good as I ever did (I never felt bad, physically), but I've lost some weight, which is a plus. (I've always carried way too much weight for my medium-sized frame.)

Even those of us who are seemingly virtuous in our eating habits need to snack once in a while, especially when we're out and about doing summertime activities. Generally, when I feel snacky, I reach for dried fruit, nuts, and granola. My number one favorite dried fruit is mango. It's fabulous, chewy and sweet, and comes in pieces big enough that two or three makes an adequate nibble. So when I was offered a selection of snacks from ShopRite's Wholesome Pantry Organic line, and they included dried mango, I jumped at it. Besides, we shop at ShopRite regularly; it is honestly one of my favorite grocery stores.

Raw cashews are also a great snack, but they can also be transformed into stuff like cashew milk and cheese substitutes. And if you prefer toasted cashews, just toss them in a heavy dry skillet over medium heat and cook for a couple of minutes until fragrant and lightly browned. Shake the skillet regularly and don't walk away from the pan--nuts are high in fat and can burn easily!

Wholesome Pantry Organic's sweet potato tortilla chips are so good! They're great with salsa, but perfect just on their own straight from the bag (my preferred method of snacking). And if you're feeling particularly naughty, they're also just lovely popped into the toaster oven with a sprinkling of grated cheese on top.

Those granola squares in the photo? Yeah, they're a smart snack for summer, but I ate one for lunch the other day (had a big breakfast) with a piece of fruit and it kept me satisfied until dinner.

The Wholesome Pantry Organic line consists of USDA-certified organic items, and "free-form" products made with simple, clean ingredients. Check them out next time you're in ShopRite--you'll find the products in every aisle, from fresh veg to meats to sauces.

* Any products in this post that are mentioned by name may have been provided to Minxeats by the manufacturer. However, all opinions belong to Minxeats. Amazon links earn me $! Please buy!

Posted on Minxeats.com.

Friday, February 22, 2019

Flashback Friday - Nutty Bars

flashback friday graphic
This post originally appeared on Minxeats.com on February 3, 2014.

-----------------------------------------

A day off work means free time to play in the kitchen! But first, I spent a few moments thumbing through a copy of Fat Witch Brownies: Brownies, Blondies, and Bars from New York's Legendary Fat Witch Bakery before deciding on the Pecan Bars.

We had about half a pound of pecan pieces in the freezer, but I opted to use half walnuts because they're less-expensive. I also didn't feel like opening the bag of light brown sugar when there was just enough dark brown sugar left to fit the bill. And...the original recipe called for rum. Mr Minx isn't the biggest rum fan in the world, so I used bourbon instead. The results were crunchy, sticky, nutty, and quite fabulous.

Make them. Now. Unless of course you have nut allergies.

Nut Bars adapted from Fat Witch Brownies

1 cup all-purpose flour
1/4 teaspoon baking powder
1 teaspoon salt
1/3 cup packed dark brown sugar
7 tablespoons cold unsalted butter, cut into small pieces
1/4 cup coarsely chopped nuts (pecans, walnuts, hazelnuts, almonds)
4 tablespoons unsalted butter
1/2 cup packed dark brown sugar
1/3 cup light corn syrup
2 teaspoons vanilla extract
1 teaspoon bourbon
1/4 teaspoon salt
1 egg
1 3/4 cups coarsely chopped nuts

Preheat oven to 350°F and grease and flour a 9" x 9" baking pan.

In the bowl of a mixer, combine the flour, baking powder, salt, and brown sugar. Add the 7 tablespoons of butter, a few small pieces at a time, and combine until mixture is sandy. Stir in the nuts. Gently press the mixture into the bottom of the prepared pan and bake for 15 minutes.

While crust is baking, melt the 4 tablespoons of butter and allow to cool. Combine brown sugar, corn syrup, vanilla, bourbon, and salt in a bowl. Stir in the cooled butter. Add the egg and mix well.

Pour the filling over the baked crust. Evenly sprinkle the nuts on top. Bake for 20 minutes, or until the filling no longer wobbles when you shake the pan gently.

Allow to cool completely before cutting, about 2 hours.

Makes 12 - 16 bars.

* Amazon links earn me $! Please buy!

Posted on Minxeats.com.

Monday, January 29, 2018

Wholesome Snacking

During the holiday season, I've been known to have meals consisting entirely of cookies (the oatmeal cookies with dried cherries turned out especially well last year). There are also plenty of celebratory get-togethers with friends, family, and co-workers that are perfect excuses to indulge. Not that I need excuses--I have always been an indulgent person. I don't feel "guilty" when I've eaten something naughty because I'm not a little girl anymore and I refuse to fall into the trap of self-loathing just because I occasionally do something that I enjoy. Ladies, you know what I'm talking about.

However, I do know there's a time to indulge, and a time to cut back on the snacking. Notice I didn't say "eliminate" snacking. Some people are snackers. Some would rather nibble a little of this and a little of that all day long than sit down and eat a meal with fork and knife. But rather than snacking on a fistful of cookies, full of sugar and fat and white flour, post-holiday snacking should involve more whole foods, like nuts and popcorn. I got into the habit of eating dried fruit and nuts when I was doing Whole30 last year, so I decided to stock up on similar snacks to ease me away from cookies and back into eating more healthily.

We shop at ShopRite Supermarkets' fairly regularly, so I decided to try items from their line of Wholesome Pantry snacks. The Wholesome Pantry brand includes hundreds of products like pasta sauce and eggs, all of which are made from simple, clean ingredients and free of unpronounceable chemicals. We already buy the Wholesome Pantry Organic Salad Blends, so venturing into snack land was a no-brainer.

We tried the Energy Mix (sunflower seeds, organic raisins, dried cranberries, nuts, and dried apples) that are great to toss in a backpack or in the car for when the urge for something crunchy/sweet/chewy arises, pecan halves, and dried Fuji apple crisps (sooo addictive) plus the somewhat more fancy Crushed Pepper & Truffle Oil popcorn. It was pretty easy to kill the whole bag while binge-watching The Crown. We also got a jar of almond butter. We eat the stuff all the time, and I like to use it in hummus.

My hummus is pretty non-traditional. I am allergic to chickpeas, so I use any other canned bean, plus almond butter, lots of garlic, lemon, and olive oil. The last time I made it, I used the Wholesome Pantry almond butter and lemon-flavored olive oil instead of lemon juice, which gave it such a sunny flavor.

I also tossed some of the Wholesome Pantry pecan halves on a warm farro and broccoli salad that I served with lamb meatballs. They added just the right crunch to the dish.

So far the healthy snacking has been working for me. The natural fats and sugars from nuts and dried fruit fill me up better than a handful of cookies, so I'm actually shoving food into my pie-hole less-often. Maybe now I'll drop those couple pounds I always seem to pick up in December.

Warm Farro and Broccoli Salad with Pecans

1 lb broccoli
Extra virgin olive oil
Salt
1/2 cup farro, cooked according to package directions
Lemon juice
Wholesome Pantry pecan halves

Preheat oven to 400°F.

Separate the broccoli into medium sized florets. Peel stems and slice them lengthwise into strips. Place on a foil-lined baking sheet. Toss with olive oil and salt and roast in a preheated oven until florets start to get some good browning on them and the stems are tender, 15-20 minutes.

Meanwhile, cook the farro.

Remove the broccoli from the oven and chop it roughly. Toss the warm broccoli and farro together in a bowl. Squeeze over lemon juice to taste and season with additional salt, if needed. You may also add other seasonings like chile flakes, garlic, black pepper--whatever sounds good to you.

Crush up a small handful of pecans and stir into the salad. Serve immediately.

Serves 2 as a meal, 4 as a side dish.

* Any products in this post that are mentioned by name may have been provided to Minxeats by the manufacturer. However, all opinions belong to Minxeats. Amazon links earn me $! Please buy!

Follow on Bloglovin

Posted on Minxeats.com.

Friday, November 10, 2017

Flashback Friday - Kofte with Pistachio Sauce

flashback friday graphic
This post originally appeared on Minxeats.com on November 19, 2012.

You may recall from my recap of Time Machine Chefs back in August that I expressed admiration for chef Silvena Rowe, of the restaurant Quince in London's May Fair Hotel. Her ballsy attitude on the show made me check if she had any cookbooks available in the U.S. - and yes, she does! A couple, actually, and I chose to buy Purple Citrus and Sweet Perfume: Cuisine of the Eastern Mediterranean, mostly because I liked the idea of purple citrus. :) While no actual purple citrus were harmed during the reading of that book, by the time I was done with it, I wanted to cook every recipe. I even bought a jar of grape leaves, which I have never used before.

The recipe that stood out most for me was for lamb kofte with pistachio sauce. Kofte are meatballs or small patties made from ground meat, and I just happened to have some ground lamb in the freezer. There were also pistachios and tahini kicking around for the sauce, as well as the last vestiges of our garden's fresh mint and all of the recipe's required spices. (Find the recipe here.)

Toasting and grinding the pistachios was the most difficult and time consuming part of the process. Well, not that either the toasting or the grinding part of the equation was difficult, but cleaning out the coffee grinder that I used for the purpose was not fun. (We have two - one for coffee, one for other stuff.) The sauce ended up tasting more of the tahini than the pistachios, which was a little disappointing, but the kofte were wonderful. I had swapped out the currants in the recipe for dried cherries, and they lent a lovely sweetness to the savory spice- and mint-flavored patties. I also chose to serve some home-made preserved lemons as a garnish, and their juicy salty tang was a perfect accent.

I hope to try other recipes from this book over the coming months and will post my adventures here. In the meantime, do try the recipe for yourself.

Follow on Bloglovin

Posted on Minxeats.com.

Monday, July 24, 2017

Charred Carrot Salad

I am really in love with charred carrots. I've made them at least twice before (here and here) and will make them again and again. I love the way the burnt outsides add another dimension of flavor to the sweet and earthy vegetable. It takes away a bit of the sweetness, actually, making them more palatable to people who are not all that fond of cooked carrots (like Mr Minx). I also love the way they smell while they are charring over the gas flame of my cooktop. Yes, they smell burnt, but that's not a bad thing.

In the past, I put the charred carrots in the oven to finish cooking, but when it's 1000 degrees outside, the microwave is a less-sweaty alternative. Takes much less time, too.

For some reason, I find that charred carrots go really well with Middle Eastern flavors, like harissa, so I whipped up a quick vinaigrette with some stuff I had on hand--lemon juice, Dijon, honey, and harissa. I don't like oily vinaigrettes--I prefer them to be on the acidy or sweet side, so I used just enough extra virgin olive oil to add richness and bind the other ingredients together. I think I made about three tablespoons of the dressing in all, so start off with tiny amounts like the juice of half a lemon, a small squirt of the mustard, a dollop of the honey, a wee bit of harissa. Beat well with a fork, then add a tablespoon or so of the oil. Beat again. Taste. If it needs more of anything, add it. If not, then you've made a very flavorful dressing with not a whole lot of work.

Add nuts and cheese to the salad--I had walnuts and bleu, but pistachios and feta would be amazing. Scallion and mint add still more flavor.

This salad would make a great meal all on its own with some good buttered bread, I think, but it would also be a fab side dish for some simple grilled chicken.

Charred Carrot Salad

4-5 medium carrots
Juice of half a lemon
1/2 teaspoon harissa or to taste
Dijon mustard
1/2 teaspoon honey or to taste
Extra virgin olive oil
Salt
1 scallion, thinly sliced on the bias
Chopped walnuts or pistachios
Bleu cheese or feta crumbles (omit if you prefer a vegan dish)
Fresh mint leaves

Peel and trim the carrots. Blot carrots dry with a paper towel and blacken on a very hot grill or over an open gas flame. Turn them regularly to blacken all sides. As the carrots are done, place them on a microwave-safe plate. When all carrots are thoroughly charred, cover the plate with plastic wrap and microwave on high power about 4-5 minutes or until tender. Remove plastic and allow carrots to cool on the plate.

Make a dressing with the lemon juice, harissa, a squirt of Dijon, the honey, and a tablespoon or so of olive oil. Beat with a fork until emulsified and taste. Add salt if needed. It should be very thick and pungent. Add more lemon or harissa if you want it more tart or spicy.

When carrots are cool, cut them on the bias into about 2" long slices. Mound them on a plate, drizzle with dressing, and top with scallions, nuts, cheese, and torn fresh mint.

Serves 2 - 4

Follow on Bloglovin

Posted on Minxeats.com.

Monday, February 20, 2017

Quick Sticky Buns

Sometime before Christmas, I received a package of samples from Davidson's Organics. Though I had never heard of them, Davidson's has been around for 40 years already. Goes to show what I know, huh? Davidson's specializes in tea, every type, from black to green to herbal, both loose leaf and bagged. Lots of fun blends like jasmine almond with orange and tulsi red vanilla. I love tea, both to drink and to cook with, so I was especially excited to receive two of their specialty tea products, jelly and chocolate, both made with Earl Grey tea.

I sat on them for a while, trying to think of what to concoct. They also sent some holiday tea bags, so I sipped tea and thought on the matter. Then it came to me. I'd make cinnamon rolls.

Yes, I know cinnamon rolls are not the first thing one thinks of when contemplating both chocolate and tea jelly, but stay with me here. The chocolate, which is flavored with both Earl Grey tea and lavender, would go into the filling, and the jelly would be part of the glaze. And I just happened to have some puff pastry in the freezer. And yes, I do know that cinnamon rolls and sticky buns are made with an enriched yeast dough, not puff pastry, I also knew that puff pastry would work just fine and it would be much much faster.

The texture of the pastry, after baking, reminded me of the creme horns my Mom liked - flaky and crisp. The chocolate didn't melt much, so there were still nice crunchy bits of both the choc and the nuts inside. I liked the combination a lot. And the icing, made with the jelly, powdered sugar, and a bit of lemon, added another dimension of flavor, and not just another layer of sweet.

Quick Earl Grey Sticky Buns

1/2 bar Davidson's Organics Earl Grey Lavender Organic Dark Chocolate
1/2 package puff pastry
Brown sugar
Cinnamon
1/4 cup chopped nuts
2 tablespoons Davidson's Organics Earl Grey Tea Jelly
Powdered sugar
Lemon juice

Preheat oven to 400°F.

Grate the chocolate and set aside.

Defrost the pastry according to package directions. Unfold sheet and go over it with a rolling pin to smooth out the creases and to enlarge the square by about 1/2 to 3/4 inch both in height and width.

Sprinkle the pastry with a thin layer of brown sugar, then shake on some cinnamon (but not too much). Add a layer of the chocolate and another of the nuts. Roll the pastry into a log, being careful not to lose too much of the filling in the process. Cut the roll in half, then cut each half into three pieces. Place pieces open-side-up on a parchment-lined baking sheet.

Bake for 20 minutes until browned and puffed. Set aside to cool.

Make the icing by microwaving the jelly until liquid, about 1 minute. Stir in enough powdered sugar to make a runny glaze. Flavor with a bit of the lemon juice.

When the buns are cool, drizzle with icing. Makes 6.

* Any products in this post that are mentioned by name may have been provided to Minxeats by the manufacturer. However, all opinions belong to Minxeats. Amazon links earn me $! Please buy!

Follow on Bloglovin

Posted on Minxeats.com.

Monday, November 07, 2016

Cottage Cheesecake

Cottage Cheese. You all know what I'm talking about. No, not the unattractive dimply stuff in our thighs. Rather, the stuff diner menus include in what they inexplicably refer to as a "diet plate," along with a bare hamburger patty and some iceberg lettuce. Or the white lumpy stuff that my mother-in-law ate on matzoh crackers with a touch of apple butter. Cottage cheese was once a popular food, but these days, the salty curds-and-cream substance seems more like punishment. The last time I tried supermarket cottage cheese, I gagged.

Of course, I once felt the same way about yogurt, and now I eat a ton of it.

Earlier in the year, at the Fancy Food Show, I tasted a new brand of cottage cheese. I'll try anything once, even camel milk and tortilla chips made with cricket flour. Expecting the same chalky curds in mucus-y sauce that I had eaten in my youth, I was pleasantly surprised to find that the curds were tender and the sauce binding them together was more like sweet cream. It was tasty. I liked it.

So when I received an e-mail from Muuna Cottage Cheese, asking if I'd be willing to try their products and write about them, I said, "sure." As it turned out, I had seen Muuna at the local grocery store just that week and had purchased the mango flavor. It was tasty. I liked it.

Muuna sent us a great box of cottage cheese goodness - 5.3-ounce cups of all five flavors (blueberry, strawberry, peach, mango, and pineapple) plus a cup of the lowfat plain. I tucked into the flavored stuff immediately, and found that while pineapple and mango were pretty good, blueberry and strawberry were even better. However, I wasn't sure I was ready to eat the plain lowfat cottage cheese on its own. So I made cheesecake with it. Pumpkin cheesecake. Because fall. Oh, and since I only had 5 ounces of cottage cheese to work with, I made minis.

There was still a bit of trepidation involved. I am a fan of smooth cheesecakes. I don't like the oddly dry texture of ricotta cheesecake, and I have never liked the old Baltimore favorite smearcase, which was commonly made with cottage cheese. So I popped the Muuna into the mini prep and gave it a whirl.

The result was an incredibly smooth cream, the texture of my favorite Australian-style yogurt. I added cream cheese, pumpkin, and spices, poured the mixture into graham cracker crusts, and popped them in the oven.

They were incredible. Seriously. I like smooth-textured cheesecakes that aren't overly-cheesy. These little babies were perfect, IMHO. Very pumpkin-y, very smooth, not too dense or cheesy. One 4-inch cheesecake was the perfect size to split with Mr Minx.

I was so pleased with the results and the texture of the blended cottage cheese, I think I might try a version without using any cream cheese at all. Maybe even a smearcase-style cake. Maybe.

Mini Pumpkin Cheesecakes for Two
I call for a mini prep to whiz the cottage cheese because it seems silly to dirty a big food processor with this ridiculously small amount of batter. If that's all you have, however, then use it. A blender would work, too. I find the Cuisinart Mini-Prep's 3-cup size is just perfect for small jobs like hummus and pesto, and it's small enough to leave on the counter at all times. Amazon has it for around $35, and I have more than gotten my money's worth.

For the crust:
1/2 cup graham cracker crumbs (I used crushed Teddy Grahams)
2 heaped tablespoons toasted unsalted pumpkin seeds (pepitas), ground in a mini prep or with a mortar and pestle if you're old fashioned
Pinch brown sugar
1/4 teaspoon ground ginger
1/4 teaspoon ground cinnamon
1 tablespoon butter, melted

For the filling:
1 (5.3 ounce) container of Muuna lowfat plain cottage cheese
1/4 cup pumpkin puree
1/4 cup sugar
1/2 teaspoon ground cinnamon
1/4 teaspoon ground ginger
1/8 teaspoon ground allspice
1/8 teaspoon ground nutmeg
Pinch salt
1 teaspoon vanilla extract
6 ounces cream cheese at room temperature
1 egg

To make the crust: Preheat the oven to 350°F.

Place the crust ingredients in a zip-top sandwich bag. Close the bag and squish the ingredients around until everything is coated with the butter. Dump the bag into two 4-inch springform pans and pat into an even layer, coming a little up the sides. Bake for 7 minutes, then remove and allow to cool to room temperature.

To make the filling: Put the cottage cheese in the bowl of a mini-prep food processor and pulse until the cheese has been pureed. Add the pumpkin, sugar, spices, salt, and vanilla and blend well. Scrape mixture into a bowl and stir in the softened cream cheese, then beat in the egg until everything is well combined.

Pour filling into prepared pans and bake at 350° for 40-45 minutes, or until puffed and set. The middle might jiggle a wee bit but should not be liquidy. If it is, bake it for an additional 5 minutes. Cool cakes on a rack. When cool, loosen the edges with a knife before releasing the sides of the pan. Wrap and foil and refrigerate until cold.

Serve topped with whipped cream.

Serves 4

* Any products in this post that are mentioned by name may have been provided to Minxeats by the manufacturer. However, all opinions belong to Minxeats. Amazon links earn me $ at no cost to you! Please buy!

Follow on Bloglovin

Posted on Minxeats.com.

Friday, December 11, 2015

Flashback Friday - Minx Fruitcake

Fruitcake is one of those things that one either loves or hates. The majority of people proclaim to hate it, but judging from the quantity of fruitcake one sees in the shops this time of year, *somebody* likes it. Other than my Dad, that is. He'll even eat the cheap-o square fruitcake logs full of plastic-looking dyed "fruit" they sell in drug stores.

I've never been a fan of the stuff myself. Until I made my own. Years back, I made a couple of fruitcakes that I soaked in booze. The idea was to allow them to mellow in the fridge for a few weeks until Christmas came around. Unfortunately, the fridge I used had humidity control issues. By Christmas day, the cakes were both green and fuzzy, and I had to throw all that work away. Now I tend to make my fruitcakes closer to Christmas, and I don't worry about boozing them up too much

--Kathy


This post was originally published on December 23, 2011.
------------------
Minx Fruitcake

Believe it or not, people have been asking for my fruitcake recipe. I usually just give guidelines but have finally put the whole thing in one place. Please to enjoy - it really is good! (And I normally hate fruitcake.)


Minx Fruitcake

1 1/2 cups of assorted dried fruits (chopped apricots, chopped figs, cherries, pineapple, blueberries, raisins, currants, candied ginger, cranberries)
1/2 cup rum
1/2 cup dark brown sugar
1 cup whole berry cranberry sauce
1/3 cup plain yogurt
1/4 cup melted butter
1 egg
2 1/4 cups flour
2 teaspoons baking powder
1 teaspoon ground ginger
1 teaspoon ground cinnamon
1/2 teaspoon ground cardamom
1/4 teaspoon ground cloves
1/2 cup candied orange rind
1/4 cup chopped neon green or red cherries for fruitcake (optional)
1 cup assorted roasted unsalted nuts (cashews, almonds, pecans, walnuts, brazil nuts, filberts)
booze

Put dried fruit in a microwave-safe bowl and pour over the rum. Stir well, cover with plastic wrap, and nuke on high for 5 minutes. Remove from oven and set aside to cool.

Preheat oven to 350F.  Spray a loaf pan with release spray and set aside. Combine the first five ingredients in the bowl of a mixer (or use a hand mixer) and mix until thoroughly combined. Stir in the flour, baking powder, and spices. Add the macerated fruit (plus the rum) and nuts. Pour into greased loaf pan. Bake 1 hour or until a toothpick inserted into the center comes out clean.

With the fruitcake still in the loaf pan, poke holes in it with a toothpick. Pour over about 1/4 cup booze of your choice (rum is nice). Allow to soak in. Add another 1/4 cup or so after the cake has cooled a bit. When cake is completely cool, remove from loaf pans and wrap tightly in foil.

* Any products in this post that are mentioned by name may have been provided to Minxeats by the manufacturer. However, all opinions belong to Minxeats. Amazon links earn me $! Please buy!

Follow on Bloglovin

Posted on Minxeats.com.

Wednesday, September 09, 2015

Spiced Peach Cake

Today is my brother's birthday, so I thought it would be appropriate to post a cake recipe. Happy birthday, Dave!

Peach season is almost over, unfortunately, and I have been loving all the sweet juicy ones we are getting from either the farmer's market or in our weekly Washington's Green Grocer delivery. I am sadly allergic to raw peaches, but if I cook them a little bit, they give me no problems (same with plums, cherries, nectarines). Ordinarily, I chop up a peach or two and put them in a microwave-safe bowl, nuke for 2 minutes, and let them cool before shoveling them in. This time, I had several more very ripe peaches than I could comfortably eat in one day. Mr Minx is not a fan of crisps or cobblers, so I decided to make a cake.

Half my life ago, I worked at Gordon's Booksellers at the Rotunda with a bunch of terrific people, many of whom are still among my closest and dearest friends. One year, we had a staff Christmas party at my house. Everyone who worked at the store was invited; we also invited one of our favorite customers. Jay worked next door at Maryland Casualty, but he dropped into the bookstore every morning to buy a newspaper and shoot the shit. He was fun and we figured he was as much a part of the Gordon's experience as any of the rest of us.

The party was pot luck, and Jay brought a loaf cake studded with peaches. Because the peaches had been canned in syrup, each piece was in a juicy little pocket of cake. I loved the texture variation, and asked him for the recipe. He complied, I put it away for safe keeping, and never used it. So this cake, while not the same as Jay's, was made with him in mind.

Spiced Peach Cake

2 cups flour
1 1/2 teaspoons baking powder
1/4 teaspoon salt
1 teaspoon ground ginger
1/2 teaspoon cinnamon
1/4 teaspoon ground cardamom
1/4 teaspoon freshly grated nutmeg
1 1/2 sticks unsalted butter, at room temperature
1 1/2 cups sugar
3 large eggs
1/2 cup sour cream or plain yogurt
1 teaspoon vanilla
1/2 cup chopped walnuts (optional)
1 pound peaches, peeled and sliced

Preheat oven to 350°F. Grease and flour a standard bundt cake pan.

Combine flour, baking powder, salt, and spices in a bowl. Set aside.

Cream the butter and sugar together until fluffy. Add the eggs one at a time, beating well after each addition. Beat in the sour cream and vanilla. Add the flour mixture, beating only until combined. Stir in the walnuts by hand.

Put about a third of the batter in the bottom of the pan. Cover with a layer of the peaches. Repeat batter and peach layers, ending with batter.

Bake for 50 minutes to 1 hour, or until a toothpick inserted in the center of the cake comes out clean. Because of the peaches, there may be pockets of moisture here and there, so try the toothpick in several areas. Don't overbake!

Follow on Bloglovin

Posted on Minxeats.com.

Friday, August 07, 2015

Chipotle Cherry Brownies

Regular Minxeats readers have to know that I am obsessed with brownies. Obsessed. (Well, not really, but that's one of those words you young'uns use all the time, regardless of its actual meaning. I'm trying to be hip with the lingo.) I've tried many brownie recipes over the years, and posted a good many of them here, including one abomination made with Splenda and black beans. (Go ahead, read that post. It's one of my favorites. Read the comments, too, while you're at it.) My all-time favorite brownie recipe is the one found on cans of Ghirardelli Sweet Ground Chocolate and Cocoa. The large sugar-and-fat to flour ratio makes for brownies that are gooey and messy, as opposed to cakey. (I suppose cakey brownies have their place, but why not just eat cake?) Mmm. So good.

I must confess that when I saw The Messy Baker: More Than 75 Delicious Recipes from a Real Kitchen in my Amazon recommendations, I put it on my wish list solely because of the cover photo. Of brownies. Deep Dark Cherry Chipotle Brownies, no less. (Yes, that's the link to the recipe on her blog. No need for you to buy her book, too, unless you want all of the other goodies inside.) Nobody purchased the book for me last Christmas, so I took it off the wish list and put it in my shopping cart. In January. But I didn't pull the trigger to buy it until August. Of course, the first recipe I tried from the book was for those brownies.

At first taste, when they were just a bit warm, I wasn't sure of the texture. They're very fudgy and dense. Which is fine, better than cakey, but not as gooey as I like. So I refrigerated them, and that made all the difference in the world. Cold from the fridge, they are like candy. Chocolate candy crack. They are spicy, but not too (and I added the full teaspoon of ground chipotle) and fruity from the cherries, which does help cut back the heat. I also added some walnuts, to add a bit of crunch, plus I like walnuts in my brownies. They are really, really good. Really good.

I think I found my second-favorite brownie. Try them. If you don't like spicy, then skip the chipotle, substitute ancho instead, or leave the pepper out entirely. And eat them cold, straight from the fridge, with a glass of milk (or a bourbon, if you're me). You won't regret it.

Follow on Bloglovin

Posted on Minxeats.com.

Wednesday, July 29, 2015

Muhammara

A couple months ago, we took a field trip to Southern Maryland for a fishing tournament. Figuring the ride would be long, we took snack foods in the form of a box of Triscuits and a tub of Trader Joe's Muhammara. We'd never tried the stuff before, muhammara, but the combination of walnuts, roasted bell peppers, and pomegranate molasses sounded really good. And it was. Really good. I could have eaten the entire container myself (AND the whole box of sweet potato/onion Triscuits - yum), but I did share with Mr Minx.

When the next stitch and bitch rolled around, I decided to make muhammara. I typically make some sort of dippy thing, because it's the neatest thing to consume while knitting. There were only two of us this time, but we pretty much killed the entire batch. So tasty, and I think this recipe from Epicurious, with my adjustments (much less bread and oil), tasted pretty similar to TJ's version, only, of course, home-made, and therefore, better.

Muhammara (adapted from Epicurious)

1 large red pepper, peeled, seeded, and roasted, or 1 1/2 jarred roasted red peppers
5 tablespoons fine fresh bread crumbs
1/2 cup walnuts, toasted lightly and chopped fine
1/2 teaspoon garlic powder
1 tablespoon fresh lemon juice, or to taste
2 teaspoons pomegranate molasses
1 teaspoon ground cumin
Big pinch cayenne
4-5 tablespoons extra virgin olive oil
Salt to taste

Blend everything together in a food processor until it's a fairly smooth paste. Serve with crackers or crudite.

Follow on Bloglovin

Posted on Minxeats.com.

Wednesday, July 01, 2015

Minty Pea Pesto with Risotto

We got two pounds of organic sugar snap peas in our farm box not long ago, which is a lot of peas. I suggested that Mr Minx make a cold salad with some of them because I really prefer my sugar snaps raw. He brilliantly threw together the peas, roughly chopped, some cucumber, and tons of mint, with a Asian-style dressing. Wow. It was so good! Sweet, crunchy, refreshing. I really loved the combo of mint and peas and decided that it would make a fine pesto-type concoction. So on the weekend, I cleaned the other pound of peas, picked some of our proliferating mint, and dug a handful of pistachios out of a bag of deluxe unsalted mixed nuts. No cheese, no garlic. I just want to taste the peas and mint, with a little earthy nuttiness for balance.

So what to do with what ended up being a pinto of pesto?

I decided to stir it into a risotto. I planned to make the risotto for dinner on one night, then to  make fried chicken (my first time) on the other. But then I was lured away from the kitchen by a soft shell crab po' boy and had to make both the risotto and fried chicken on the same day. I didn't want to stir risotto while a freakishly hot cast iron skillet full of grease and chicken parts bubbled away like a witch's cauldron  mere inches away. One, I figured I would do something stupid and burn myself, and two, it was already too hot and humid outside. Didn't need the kitchen to feel the same way.

So I thought I maybe could try making a risotto in the rice cooker. I Googled it, and found that Wolfgang Puck said it was ok. And so it was. It was as good as my non-rice-cooker risotto, which is occasionally very good but most often only decent. In any case, it certainly helped keep the kitchen cool and allowed me to avoid the scary two-pan scenario.

You can certainly make risotto the old-fashioned way and stir the pesto in afterward. Up to you.

Rice Cooker Risotto with Minty Pea Pesto

For the pesto:
1 lb sugar snap peas
1/4 cup shelled unsalted pistachios
1/2 cup packed mint leaves
Extra virgin olive oil
Kosher salt to taste

For the risotto:
2 cups (the ones that come with your rice cooker) Arborio rice, rinsed and drained
1/2 teaspoon salt
1 cup chicken or veg broth
Freshly ground pepper
Freshly grated Parmesan

To make the pesto: Remove stems and strings from peas. Open several of them and reserve the peas for garnish. Put the rest in a food processor with the pistachios and mint. Add enough olive oil to allow you to puree the peas, nuts, and mint into a chunky paste. Season with kosher salt and refrigerate in a tightly covered container until ready to use.

To make the risotto: Put the rice in the rice cooker and fill the bowl with water to between the 1 and 2 marks and add the salt. Cook rice for 20 minutes, then turn to the "keep warm" setting.

Open the rice cooker and pour in the chicken broth, stirring vigorously. The rice should be creamy. Season with pepper, adding more salt if necessary.

Stir several tablespoons of the pesto into the risotto. Scrape into a serving bowl and top with the reserved peas and some Parmesan. Garnish with mint, if desired.

**You'll have tons of pesto left over to smear on fish or chicken or whathaveyou. It's great with ricotta on thickly sliced, lightly-toasted, country-style bread, too.

Follow on Bloglovin

Posted on Minxeats.com.

Friday, April 17, 2015

Chocolate Coconut Parfaits

I get ideas for desserts all the time, but they're usually random things I put together on a weekend and mostly for the blog. Blogging requires attention, you see, and I'm always thinking about it. When I have to come up with a dessert for an occasion of some sort, usually a holiday, I panic a little. It's all well and good to dream up something that only Mr Minx and I are going to eat, but there's more pressure when guests are involved, even if it's family and they're (mostly) non-judgmental about what we put in front of them. But there are always diets and dietary restrictions to think of and what sort of thing will go well with the entree we've just eaten.

I liked the idea of coconut cake for a party dessert. A big ol' yellow layer cake slathered in white icing and mounds of coconut, like the lovely versions at Clementine and the Peppermill. Unfortunately, not everyone likes the texture of coconut shavings. (I'm looking at Mr Minx here.) He doesn't mind the flavor of coconut though, and had in the past suggested that I make Martha Stewart's coconut crunch cake without the macaroon layer. While I agreed that it was a good idea, I still made the cake as written three times. (He did eat it all three times, coconut shavings and all). This time, I decided to do as the poor dear said, because I wanted a flavored cake to use as layers in a mini trifle of sorts, with chocolate pudding and almonds. Sometimes you feel like a nut and all that.

Chocolate Coconut Parfaits

For coconut cake:
1 1/2 cups all-purpose flour
1/2 teaspoon baking powder
1/4 teaspoon baking soda
1/2 teaspoon kosher salt
1/2 cup cream of coconut
1 teaspoon pure vanilla extract
1 stick unsalted butter at room temperature
1/4 cup coconut oil
1 cup sugar
3 large eggs

For pudding:
1/4 cup sugar
1/4 cup unsweetened cocoa powder
2 1/2 tablespoons cornstarch
Pinch of salt
2 cups whole milk
1 large egg
4 ounces semi sweet chocolate, finely chopped

To assemble:
Coconut shavings
Sliced almonds

To make cake: Preheat oven to 350°F. Line a jelly roll pan with a single piece of parchment cut to size. If you are like me, you don't have a jelly roll pan, so just use a smaller baking sheet with sides. Mine is about 9" x 11" but it's very old--YMMV. Cut parchment to size. If you're using a small sheet pan, cut two pieces.

Whisk together flour, baking powder, baking soda, and salt. In another bowl, stir cream of coconut and vanilla.

Beat butter and coconut oil on medium-high until smooth. Slowly add sugar; beat until pale and fluffy, 3 to 5 minutes. Reduce speed to medium; add eggs, 1 at a time, beating well after each and scraping down bowl as needed. Add the cream of coconut mixture and beat until completely mixed. Stir in the flour until just combined.

If you're using a jelly roll pan, you can probably add all of the batter. You don't want it to overflow though, so if there's excess batter, put it in a muffin tin and bake it later. If you're using a smaller pan, put in about 1/3 of the batter and spread smooth. Bake a larger sheet for 20-25 minutes and a smaller sheet 13-17 minutes, until cake springs back when pressed lightly with a finger. Cool on a rack. If you're using a smaller sheet, once cool enough to handle, remove the cake from the pan with the parchment attached. Place a fresh parchment in the pan. Add 1/3 of the batter, spread smooth, and bake 13-17 minutes. You can bake a third cake, if you want, or put the remaining batter in a muffin tin, or a mini loaf cake pan.

When cakes are cool, place them face down on a cutting board large enough to hold them, or, barring that, a clean countertop. Peel off the parchment. If there's cake clinging to the parchment, just scrape it off and eat it - cook's treat.

Using the top of the glass you plan on layering the cake in, cut out at least three rounds per glass. Save the cake scraps for snacking on. Place cake circles between layers of waxed paper and store in a covered container up to overnight, until ready to use.

To make pudding: Whisk together sugar, cocoa powder, cornstarch and salt in a 2-quart heavy saucepan, then gradually whisk in the milk. Bring to a boil, whisking constantly, and boil, whisking, until pudding is thick, 3 to 5 minutes. Remove from heat.

Immediately beat egg lightly in a medium heatproof bowl, then very gradually add hot pudding to the egg, whisking constantly. Whisk in chopped chocolate until smooth.

Pour pudding into a bowl with a lid or cover surface with wax paper to prevent a skin from forming. Refrigerate, covered, until cool, at least 2 hours.

To assemble parfaits: Place a cake round at the bottom of each of six serving glasses. Add two tablespoons of cooled pudding, a big pinch of coconut and another of almonds, then another cake round. Repeat layers, ending with a cake round. Garnish with coconut and almonds.

Serves 8.

Follow on Bloglovin

Posted on Minxeats.com.

Friday, April 03, 2015

Maple Bacon Bourbon Sticky Buns

A few years back, my friend Kate and I would make a regular pilgrimage to South Jersey to get haircuts. Yes, that is a long way to travel from Baltimore, and yes, there are hair stylists in this town, but we enjoyed the road trip. That, and the visit with our stylist, Karen, who, along with her husband, are personal friends.

On the way to Jersey, we'd have to make at least one pit stop, preferably at one of the rest stops in Delaware. We'd hit the Starbucks for coffee and Cinnabon for a decadent cinnamon roll. It was during these every-6-to-8-weeks road trips that I realized something.

I don't really like cinnamon rolls.

It's the cinnamon thing. While I like cinnamon just fine, especially when it's part of a blend of spices, like in pumpkin pie or chai, I'm not so fond of it when it's used by the cupful. Bagels and other pastries encrusted in a layer of gritty cinnamon isn't my thing. And neither are cinnamon rolls.

Sticky buns are another thing entirely.

Give me a brioche-style pastry coated in sticky goo and nuts, and I'm a happy girl. I love the sticky buns at Au Bon Pain, but they have over 800 calories each. Ouch. They are a rare treat, eaten on days when I don't plan to have lunch, and dinner is going to be light (that means almost never). I got it in my head recently that I wanted to try baking my own sticky buns. Not that they'd have less calories or anything. I've been getting over my fear of baked goods, and watching the Great British Baking Show on PBS made me want to try something more challenging than my usual brownies and chocolate chip cookies. So I found a recipe I thought sounded good and altered it to my tastes. Not just pecan sticky buns, my additions of maple syrup, bacon, and bourbon make them a little more savory and slightly less sweet than traditional sticky buns. They're great for breakfast or dessert, or hell--even dinner.

They do have a bit of cinnamon in the filling, but it's barely enough to notice. It just rounds out the flavor a bit.

Preheat oven to 350°F. Bake buns until puffed and golden, 30-40 minutes. If they brown too quickly, cover with foil. To ensure the buns are cooked, use an instant read thermometer to measure the internal temperature, which should be around 180°F. Let buns cool for a couple of minutes, then place a platter a couple of inches larger than the pan over the buns. Carefully invert the pan onto the plate. The buns should slide right out. Spoon any sauce that remains in the pan over the buns.

Maple Bacon Bourbon Sticky Buns

For the dough:
1/2 cup milk, warmed to 110°F
1 1/4 teaspoon active dry yeast
2 teaspoons sugar
3 tablespoons cooled melted butter
2 whole large eggs and 1 egg yolk
1/2 teaspoon kosher salt
2 cups all-purpose flour

For the sauce:
2 tablespoons bacon fat
1/2 cup dark brown sugar
1/4 cup bourbon
3 tablespoons maple syrup
1/2 cup heavy cream
Pinch kosher salt

For the filling:
4 tablespoons dark brown sugar
1/2 teaspoon ground cinnamon
1 tablespoon softened butter
1 scant cup chopped toasted pecans
1/2 cup crumbled bacon

Put the milk in the bowl of a stand mixer fitted with a dough hook. Combine the yeast and sugar and stir into the milk. After five minutes or so, the liquid should appear foamy or thickened. Add the melted butter and eggs and stir to combine. Add the salt and flour. Turn the mixer on to low and beat until a dough forms, scraping bowl down as necessary. Turn the speed up to medium low and knead dough for 5 - 7 minutes, until it pulls away from the side of the bowl cleanly. The dough will be sticky.

Remove the dough and pat it into a ball. Dribble a little bit of oil into a bowl, and put the dough ball into it, rolling it in the oil to coat. Cover the bowl and allow dough to rise until doubled, 1-1 1/2 hours.

While dough is rising, make the sauce.

Melt the butter in a heavy saucepan over medium heat. Stir in remaining ingredients. Bring to a boil, then reduce heat to medium low and simmer until golden brown, five minutes or so. Pour sauce into 9" round baking pan, swirling the pan so the sauce also coats the sides. Put the pan in the fridge until the dough is done.

Combine brown sugar and cinnamon in a small bowl. Remove the pan with cooled sauce from fridge and sprinkle with half the pecans.

Put the dough onto a floured work surface and roll into a 9" x 12" or so rectangle. Using your fingers, smear the softened butter evenly over the dough, then sprinkle on the filling, followed by the rest of the pecans and the bacon. Roll the dough into a tight loaf. Gently slice the loaf into 6 evenly sized pieces using a serrated knife. Arrange buns over the pecans and sauce in prepared pan. Cover with a tea towel and allow buns to rise at room temperature for another hour or two, until they are crowding each other in the pan. You may also refrigerate the pan at this point and bake the buns the next day. Make sure to remove the pan from the fridge an hour before you want to bake the buns.

Allow to cool a bit more before handling. Enjoy warm or at room temperature. Makes 6 large buns.

Follow on Bloglovin

Posted on Minxeats.com.