Showing posts with label spices. Show all posts

Thursday, November 16, 2023

Throwback Thursday - Apple Tart (Originally Raw Spice Bar)

This post originally appeared on November 19, 2018.

Sadly, this company no longer offers this very versatile sweet spice blend, and when I inquired as to why, I didn't get a very polite answer from them. However, you can still make a delicious tart with regular apple pie spices. And if you want to get closer to the original Raw Spice Bar blend, add tiny pinches of ground cardamom, star anise, rosemary, and black pepper, too.
---------------------------------------------------------

Fall is apple season, and all I want to do is bake them up in some delicious way. Like good old baked apples, for example, peeled and cored apples stuffed with butter, spices, and brown sugar and baked until tender. I like to serve them warm with a dollop of whipped cream, or--even better--a scoop of salted caramel ice cream. And whipped cream. Apple pies, too. Mr Minx made a fab apple galette a couple of weeks ago, mounding sliced apples seasoned with a little lemon juice into a pie crust brushed with apricot jam and baking it until golden brown.

I normally only season apples with cinnamon, but when Raw Spice Bar sent me a selection of their freshly ground spice mixtures to try, I found myself using a far more exotic blend on my fall apple creations. Their Apple Pie Spices contain not only cinnamon, but also nutmeg, allspice, ginger, green cardamom, star anise, grains of paradise, and rosemary. Yeah, those last four are pretty out of the ordinary for apple pie, especially the grains of paradise. It's an African pepper that while not as spicy as the usual black peppercorns, still has a kick. Somehow, though, the disparate spices all work pretty harmoniously with apples. I'm thinking this blend would work well with other fall-ish creations, too, like pumpkin pie or bread and in oatmeal cookies.

Rather than a typical two-crust apple pie, I decided to try my sample of Raw Spice Bar spices in an open-faced apple tart. I used a removable-bottom tart pan that doesn't get nearly enough love, and a grand total of five ingredients. (If you want to make your own pie crust, that will add a few ingredients to the list, but not many.) the result was pretty darn good, if I do say so. And pretty, in a rustic sort of way (I am not a perfectionist).

Raw Spice Bar has several interesting spice blends, along with individual spices. I think I want to try the Ethiopian Berbere, Persian Advieh, and their salt-free chili powder when I place an order, also the Bourbon-smoked New Mexico smoked paprika, and the Hatch and Urfa Biber chiles. Their spices are sold in small portions so they're always fresh, and their subscription service means you will get a new fresh batch on a regular basis. Check them out.

In the meantime, here's the apple tart recipe. Enjoy!

Apple Tart

1 refrigerated pie crust
4 large apples, like Cortland
2 tablespoons sugar
2 teaspoons Raw Spice Bar Apple Pie Spices
2 tablespoons apricot jam

Preheat oven to 400°F.

Unroll pie crust into a 9" tart pan with removable bottom. Carefully press crust into all of the pan's nooks and crannies and trim the excess dough at the top. Refrigerate the crust for 15 to firm up.

Peel and core the apples. Cut each into quarters and cut the quarters into 6-8 slices. Toss the apple with the sugar and spices.

Remove the crust from the fridge. Starting from the outside and working in, arrange the apple slices--curved side up--in concentric circles. Don't worry if it's not neat or perfect. Once you have filled in the entire tart, take some of the remaining slices (you will have plenty) and insert them in between the pieces already in the pan. If there are leftovers, eat them.

Bake the tart for 15 minutes at 400°F, then turn the temperature down to 350°F and bake an additional 25 minutes. Remove the pan from the oven and place on a cooling rack.

Melt the jam in the microwave for a few seconds, then use a pastry brush to top the tart with a thin layer.

Allow to cool completely before slicing. Remove the sides of the pan to make slicing easier. If you want, you can also slide the tart off the pan bottom, but I always leave it on. It makes life easier.

Serves 8.

* Any products in this post that are mentioned by name may have been provided to Minxeats by the manufacturer. However, all opinions belong to Minxeats. Amazon links earn me $! Please buy!

Posted on Minxeats.com.

Monday, July 18, 2022

Street Cauliflower - Sponsored Post

Is there any such thing as "street cauliflower" for reals? I had it at Baltimore-area restaurant La Food Marketa and loved it. A riff on a Mexican street food dish commonly made with corn and known as elote (on the cob) or esquites (off the cob), LFM's version topped cauliflower with cotija cheese, taco spice, and chili lime mayo. A tortilla crumble was employed for a much-needed texture contrast. When I got home that evening, I realized that I was in possession of a cauliflower and could easily make a riff on this dish at home. 

My pantry is currently stocked with food samples after a trip to NYC for the Summer Fancy Food Show. Among them are products from Runamok Maple and Olivia's Croutons. Normally when I make esquites, I whip up a little sauce with mayo, sour cream or yogurt, chipotle, lots of lime, and a bit of maple or agave syrup to balance out the tangy flavors. It's reminiscent of the sauce the late, lamented Gypsy Queen food trucks used on their crab cake tacos, and I've made it numerous times. This time, I omitted both the sweet stuff and the chipotle and drizzled Runamok's Chipotle Morita honey directly onto the cauliflower. (And then I had a spoonful of it for a "cook's treat.") It has a nice balance of rich honeyed sweetness and smoky chipotle heat, and I can see myself using it in a lot of applications, both savory and sweet. 

I didn't have any tortilla chips on hand, If I had, I wasn't inclined to do anything other than bash them into bits--forget making a crumble. But I did have a box of Olivia's Cornbread Dressing! The cubes of crisp cornbread are seasoned lightly with somewhat Thanksgiving-y herbs, but after sampling a few several, I determined that they wouldn't detract from the overall Mexican-ish flavors of the dish at all. 

I hesitate to supply a recipe, since I just winged it (wung it?) as I usually do. I'll just offer guidelines, since I know many people prefer a recipe, or at least a list of ingredients.

Street Cauliflower

1 whole cauliflower (or hell, a bag of frozen cauliflower)
Salt
Full-fat plain yogurt or sour cream
Mayonnaise
Chili powder
Lime
Crumbly tangy cheese, like cotija or feta
Runamok Maple Chipotle Morita infused honey
Olivia's Cornbread Dressing
Cilantro
Chopped green onion or slivers of red onion

Trim the stem and any green leaves off the cauliflower. Cook in your favorite method. I put it, whole, in a big pot with enough salted water to come up about halfway, brought it to a boil, then turned down the heat and covered the pot. When the fork was tender most of the way through when I stuck a knife into it, I took it off the heat and drained off the water. You could also separate the florets, toss them with a little olive oil and salt, and roast them in a 400F oven until they're a texture you like. Or just pop a bag of frozen cauliflower in a microwave-safe bowl, cover it, and nuke it until hot and tender.

While the cauliflower is cooking, make the yogurt sauce. Put a half cup or so of sour cream or yogurt in a bowl. Add a heaping tablespoon of mayonnaise (or leave it out, if you prefer). Add chili powder to taste - start with a teaspoon, mix it in well, and add more if you want. Then squeeze in some lime juice. Taste, add more lime, add more chili powder, etc. until it tastes pretty good. Then add the magic flavor enhancer - salt. Not too much. Just enough to bring out the flavors of everything you just put in. If you happen to use a salted Mexican-type seasoning rather than chili powder, then ixnay on extra sodium. You could use Tajin and leave out the lime, too, unless you want more tang. It's up to you. 

Pile the cauliflower on a plate. You could put some salsa down on the plate first, like I did, but it's totally optional. (I had half a jar of tomatillo salsa that I didn't want to go to waste.) Dollop with the lime yogurt, drizzle on the honey, sprinkle on the cheese, crushed cornbread croutons, cilantro, and onions. 

Serves 2 as an entree, 4-6 as a side, dependent on one's appreciation for cauliflower.

* Any products in this post that are mentioned by name may have been provided to Minxeats by the manufacturer. However, all opinions belong to Minxeats. Amazon links earn me $! Please buy!

Posted on Minxeats.com.

Monday, March 07, 2022

Gluten-free Pumpkin Spicewalla Chai Masala Streusel Muffins

One of the most important things in my kitchen is my collection of herbs and spices. Without them, food would be bland and uninteresting. I have never been brand-loyal--I buy everyday spices that are the most affordable, but once in a while I splash out for a blend that seems too delicious to pass up. I'm always open to trying new things, so I was pretty pleased when Spicewalla offered to send me a selection of their spices to play with. Four were savory blends, but I cracked into the two sweeter items right away. The first thing I did was to make golden milk with their Golden Milk blend (Turmeric, Cinnamon, Ginger, Black pepper, Nutmeg, Roasted Coriander) warm hemp milk, and a dash of maple syrup for sweetness. I like to make a base mixture first, combining a few heaping teaspoons of spices with non-dairy milk to make a very runny paste and keeping that in the fridge. Then when I want a bit of warm golden milk before bedtime, I mix a few spoonsful of the paste into about half a cup of hemp milk and warm it in the microwave, adding a bit of maple for sweetness. (A half cup is plenty, as I don't want to drink too much liquid before going to bed at night.) Spicewalla's blend has all the right elements for a tasty and soothing sweet-savory beverage.

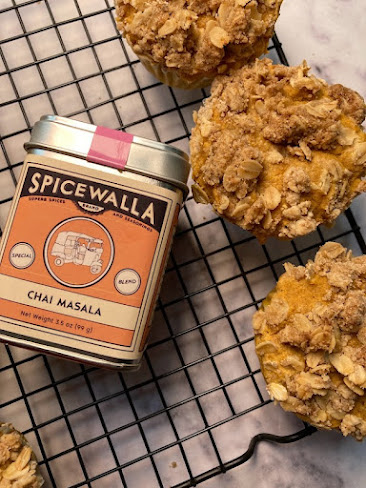
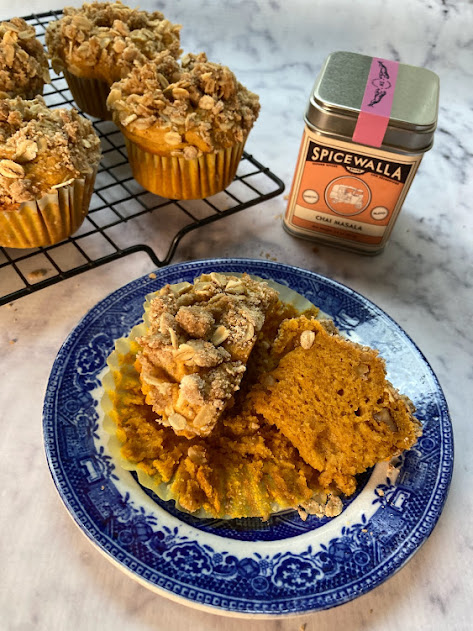
The other spice I used right away was the Chai Masala blend, though not to make chai. (Did you know that since "chai" means tea, saying "chai tea" is like saying "tea tea?") I thought it would be perfect as the spice in some pumpkin muffins. And damn if I wasn't absolutely right! Spicewalla's freshly-ground small-batch blend of ginger, cinnamon, green cardamom, black pepper, clove, and allspice was the perfect seasoning for these ultra-moist muffins. Like pumpkin spice, but with a little bit extra. While plain muffins are nice, muffins topped with streusel are even nicer, texture-wise. I also added chopped walnuts to the batter. Chopped, toasted, pecans or almonds would work as well, or you can omit both the streusel and the nuts. Up to you. 

Did you catch the words "gluten-free" in the title of this post? Since 2019, I've been on a mostly gluten-free diet, which I have found is a big help in losing weight. Sometimes, though, I crave a sweet treat that's not a piece of chocolate (though nothing is wrong with that!), like a cookie, cupcake, or muffin. There are several good gluten-free flour blends on the market, but I am not particularly crazy about the texture of ones that are primarily rice flour; I find it to be gritty. Almond flour makes a tasty wheat flour substitute, but I find that makes things too dense. A combination of GF flour and almond flour is just perfect, and what I used in this recipe. (If you're ok with gluten, you may substitute 1 3/4 all purpose white flour for the GF and almond flours.)

I know, enough talking. Here's the recipe.


Gluten-free Pumpkin Spicewalla Chai Masala Streusel Muffins 

For the muffins:
3 large eggs
1 15-ounce can pumpkin purée
1 cup gluten-free all-purpose flour 
1/2 teaspoon xanthan gum (optional, only if your flour blend doesn't already include xanthan gum)
3/4 cup finely ground almond flour
1/2 cup sugar
1/2 cup brown sugar
2 teaspoons baking powder
1/2 teaspoon salt
2 teaspoons Spicewalla Chai Masala spices
1 stick butter, softened
1/2 cup chopped toasted walnuts, optional

For the streusel:
1/4 cup Gluten-Free All-Purpose Flour
1/4 cup rolled oats
1/4 cup brown sugar
1 teaspoon Spicewalla Chai Masala spices
pinch of salt
2 tablespoons butter, melted

To make the muffins:
Preheat the oven to 375°F. Grease one 12-well or two 6-well standard-size muffin tins.

Whisk together the eggs and pumpkin purée. Set aside.

Whisk together the gluten-free flour (with additional xanthan gum, if needed), almond flour, sugars, baking powder, salt, and Spicewalla Chai Masala spices.

Using a hand or stand mixer, whip the butter until fluffy. Add in the flour mixture and combine until it looks like wet sand. Add the egg/pumpkin mixture a bit at a time, beating well after each addition. The final mixture should be light and fluffy. Stir in the walnuts, if using.

Scoop the batter into the prepared pan, filling each cup to the top. Let the batter rest for 10 minutes.

To make the streusel:
Combine all of the ingredients until it forms crumbs. Sprinkle about a tablespoon onto each muffin, pressing it in so it sticks. 

Bake the streusel-topped muffins for 22 to 25 minutes, until the middle springs back when lightly touched. Let rest for 5 minutes before removing muffins from the pan. 

12 servings

Posted on Minxeats.com.
I received a collection of spices from Spicewalla, including the Chai Masala spices, but I am not being otherwise compensated for this post.

Monday, January 21, 2019

Raw Spice Bar

Though I live in the hometown of one of the biggest spice producers in the world, I find myself buying spices online far more often than I buy them in the supermarket. It's not that I don't trust the supermarket brands--I have never had an issue with any of them--it's that I really have no idea how long those spices have been hanging around the store. Especially more exotic items, like star anise or garam masala. How often does the average Giant/Safeway/ShopRite/Wegman's shopper buy something like that, and how often does the store replenish its stock?

There are several really good spice shops online, and I've tried them all. Each has products not available at the others. Some shops have really wide ranges of seasonings, while other shops carry what might be considered more specialty items. RawSpiceBar is in the latter category. While they do sell things that just about everyone has in their spice rack--granulated garlic, cumin, ginger, peppercorns--they also have the more esoteric grains of paradise (a member of the ginger family that's like a citrusy black pepper), sansho peppers (a Japanese cousin of Sichuan peppercorns), and asafoetida (a stinky resin used as a substitute for garlic and onions in some Indian dishes). RawSpiceBar specializes in spice blends, and as with the individual spices, they have both the familiar (poultry seasoning, herbes de Provence, taco seasoning) and the exotic (Ethiopian berbere, Turkish baharat, Indian chaat masala). Rather than use larger jars, RawSpiceBar sells their freshly toasted and ground spices in 1-ounce containers (about 2 tablespoons). With their subscription service, customers can choose to have their supply replenished in 1, 3, or 6 month intervals, so they never really run out, yet the spices are fresh every time.

When RawSpiceBar approached me with samples in exchange for writing about them, I couldn't pass up the opportunity to try another source for seasonings. I was especially interested in the more oddball spice blends, but was happy to take whatever they sent. To be honest, I was a little disappointed to receive a package of apple pie spices. I mean, how interesting is cinnamon, nutmeg, and allspice? Not very. But RawSpiceBar's version of this blend also contains green cardamom, ginger, star anise, grains of paradise, and rosemary. It's a blend that definitely kicks the milquetoast ass of supermarket apple pie spices. It's bold. It's spicy. And it goes fabulously with apple, as I found when I used it in a simple apple tart. But it also works with pumpkin. I made a quick pumpkin butter with leftover canned pumpkin, brown sugar, and a big pinch of RawSpiceBar apple pie spices and pretty much ate the butter straight from the jar with a big spoon.

Thanks to RawSpiceBar for introducing themselves to my pantry. I have a couple more samples that I will be playing with in the future, and then I'm going to order myself some fancy stuff like French vadouvan, Persian advieh, and Japanese curry powder. Yum.

Spicy Apple Tart

4 large apples (I have found that Cortland are especially tasty in tarts, but use your favorite)
2 tablespoons lemon juice
1 tablespoon Raw Spice Bar apple pie spices
1/4 cup sugar
1 refrigerated pie crust
Apricot jam

Peel the apples and cut them into quarters. Slice off the core bit and cut each quarter into 4-5 slices. Put in a large bowl and toss with lemon juice, spices, and sugar.

Preheat oven to 375F.

Place the crust into a 10" or 11" tart pan with removable bottom, gently pushing the dough to fill the corrugated sides. Trim excess pastry flush with the top of the pan. Arrange the apple slices in concentric circles within the pastry, making sure to fill in all the gaps with other apple slices. It doesn't have to look neat or perfect; it will still be beautiful.

Bake for 40-50 minutes, until the apples have started to brown and the crust is a nice golden brown. Remove from the oven to a cooling rack and allow the tart to cool for at least 30 minutes.

Warm a few tablespoons of apricot jam in the microwave until it's more liquidy. Brush a thin coating of it over the cooled tart.

Serve warm, room temperature, or slightly chilled. Whipped cream, creme fraiche, or ice cream are fine accompaniments.

Posted on Minxeats.com.

Monday, November 19, 2018

Raw Spice Bar #sponsored

Fall is apple season, and all I want to do is bake them up in some delicious way. Like good old baked apples, for example, peeled and cored apples stuffed with butter, spices, and brown sugar and baked until tender. I like to serve them warm with a dollop of whipped cream, or--even better--a scoop of salted caramel ice cream. And whipped cream. Apple pies, too. Mr Minx made a fab apple galette a couple of weeks ago, mounding sliced apples seasoned with a little lemon juice into a pie crust brushed with apricot jam and baking it until golden brown.

I normally only season apples with cinnamon, but when Raw Spice Bar sent me a selection of their freshly ground spice mixtures to try, I found myself using a far more exotic blend on my fall apple creations. Their Apple Pie Spices contain not only cinnamon, but also nutmeg, allspice, ginger, green cardamom, star anise, grains of paradise, and rosemary. Yeah, those last four are pretty out of the ordinary for apple pie, especially the grains of paradise. It's an African pepper that while not as spicy as the usual black peppercorns, still has a kick. Somehow, though, the disparate spices all work pretty harmoniously with apples. I'm thinking this blend would work well with other fall-ish creations, too, like pumpkin pie or bread and in oatmeal cookies.

Rather than a typical two-crust apple pie, I decided to try my sample of Raw Spice Bar spices in an open-faced apple tart. I used a removable-bottom tart pan that doesn't get nearly enough love, and a grand total of five ingredients. (If you want to make your own pie crust, that will add a few ingredients to the list, but not many.) the result was pretty darn good, if I do say so. And pretty, in a rustic sort of way (I am not a perfectionist).

Raw Spice Bar has several interesting spice blends, along with individual spices. I think I want to try the Ethiopian Berbere, Persian Advieh, and their salt-free chili powder when I place an order, also the Bourbon-smoked New Mexico smoked paprika, and the Hatch and Urfa Biber chiles. Their spices are sold in small portions so they're always fresh, and their subscription service means you will get a new fresh batch on a regular basis. Check them out.

In the meantime, here's the apple tart recipe. Enjoy!

Apple Tart

1 refrigerated pie crust
4 large apples, like Cortland
2 tablespoons sugar
2 teaspoons Raw Spice Bar Apple Pie Spices
2 tablespoons apricot jam

Preheat oven to 400°F.

Unroll pie crust into a 9" tart pan with removable bottom. Carefully press crust into all of the pan's nooks and crannies and trim the excess dough at the top. Refrigerate the crust for 15 to firm up.

Peel and core the apples. Cut each into quarters and cut the quarters into 6-8 slices. Toss the apple with the sugar and spices.

Remove the crust from the fridge. Starting from the outside and working in, arrange the apple slices--curved side up--in concentric circles. Don't worry if it's not neat or perfect. Once you have filled in the entire tart, take some of the remaining slices (you will have plenty) and insert them in between the pieces already in the pan. If there are leftovers, eat them.

Bake the tart for 15 minutes at 400°F, then turn the temperature down to 350°F and bake an additional 25 minutes. Remove the pan from the oven and place on a cooling rack.

Melt the jam in the microwave for a few seconds, then use a pastry brush to top the tart with a thin layer.

Allow to cool completely before slicing. Remove the sides of the pan to make slicing easier. If you want, you can also slide the tart off the pan bottom, but I always leave it on. It makes life easier.

Serves 8.

* Any products in this post that are mentioned by name may have been provided to Minxeats by the manufacturer. However, all opinions belong to Minxeats. Amazon links earn me $! Please buy!

Posted on Minxeats.com.

Monday, March 27, 2017

Shrimp Dip

I like to make dips, so much so that I think my next cookbook might be all about them. Why do I like them so much? Besides the obvious deliciousness factor, dips are versatile. Though some are specifically meant to be eaten at room temperature or cold, many can also be heated until bubbly and golden. Some can also be re-purposed as a sauce for pasta (like the corn dip in this pasta casserole) or a sandwich component (try crab dip on a hot dog). If the dip is hearty enough, it can be dinner (see: fondue).

When we received samples of Farmer's Pantry Cornbread Crisps, I determined that they needed a dip. Well, not really--they are perfectly delicious on their own. The jalapeno flavor is especially tasty, and it does indeed have a peppery kick. I found myself eating them by the handful even before the dip came out of the oven. By that time, I was getting full, so the dip became my dinner. (Mr Minx's too, even if he didn't eat half a bag of Crisps before dinnertime).

The dip is full of chunks of shrimp and artichokes, with lots of cheese and a few sliced almonds scattered on top for crunch. It's one of those things that would also work really great as a topping for chicken breast fillets or pasta, so consider that if you have any left over. And that's a big "if."

Shrimp and Artichoke Dip

1/2 onion, chopped
1/4 red bell pepper, chopped
Olive oil
Pinch salt
8 ounces of shrimp, peeled, deveined, and chopped into dime-sized pieces
2-3 teaspoons Chesapeake Bay-style seafood seasoning, like The Spice Lab Best of the Bay
4 ounces cream cheese at room temperature
3 tablespoons mayonnaise
1/2 cup grated Swiss cheese
1/2 cup grated Parmesan + more for topping
1 (14-oz) can artichoke heart quarters, drained, chopped, and blotted dry
Lemon juice
Sliced almonds

Preheat oven to 375°F.

Over medium-high heat, cook the onion and bell pepper in a bit of olive oil and a pinch of salt until translucent. Stir in the shrimp and cook a few minutes until opaque. Stir in Bay seasoning to taste.

In a large bowl, combine the cream cheese and mayo. Stir in the Swiss cheese, the 1/2 cup of Parm, the artichokes, and the shrimp mixture. Add lemon juice to taste.

Scrape the mixture into a round or square 8" baking dish, or into individual ramekins. Top with additional Parm and some of the sliced almonds. Bake for 15-20 minutes until oozy and the cheese and almonds are browned.

Serve with Cornbread Crackers or sliced French bread.

* Any products in this post that are mentioned by name may have been provided to Minxeats by the manufacturer. However, all opinions belong to Minxeats. Amazon links earn me $! Please buy!

Follow on Bloglovin

Posted on Minxeats.com.

Monday, November 07, 2016

Cottage Cheesecake

Cottage Cheese. You all know what I'm talking about. No, not the unattractive dimply stuff in our thighs. Rather, the stuff diner menus include in what they inexplicably refer to as a "diet plate," along with a bare hamburger patty and some iceberg lettuce. Or the white lumpy stuff that my mother-in-law ate on matzoh crackers with a touch of apple butter. Cottage cheese was once a popular food, but these days, the salty curds-and-cream substance seems more like punishment. The last time I tried supermarket cottage cheese, I gagged.

Of course, I once felt the same way about yogurt, and now I eat a ton of it.

Earlier in the year, at the Fancy Food Show, I tasted a new brand of cottage cheese. I'll try anything once, even camel milk and tortilla chips made with cricket flour. Expecting the same chalky curds in mucus-y sauce that I had eaten in my youth, I was pleasantly surprised to find that the curds were tender and the sauce binding them together was more like sweet cream. It was tasty. I liked it.

So when I received an e-mail from Muuna Cottage Cheese, asking if I'd be willing to try their products and write about them, I said, "sure." As it turned out, I had seen Muuna at the local grocery store just that week and had purchased the mango flavor. It was tasty. I liked it.

Muuna sent us a great box of cottage cheese goodness - 5.3-ounce cups of all five flavors (blueberry, strawberry, peach, mango, and pineapple) plus a cup of the lowfat plain. I tucked into the flavored stuff immediately, and found that while pineapple and mango were pretty good, blueberry and strawberry were even better. However, I wasn't sure I was ready to eat the plain lowfat cottage cheese on its own. So I made cheesecake with it. Pumpkin cheesecake. Because fall. Oh, and since I only had 5 ounces of cottage cheese to work with, I made minis.

There was still a bit of trepidation involved. I am a fan of smooth cheesecakes. I don't like the oddly dry texture of ricotta cheesecake, and I have never liked the old Baltimore favorite smearcase, which was commonly made with cottage cheese. So I popped the Muuna into the mini prep and gave it a whirl.

The result was an incredibly smooth cream, the texture of my favorite Australian-style yogurt. I added cream cheese, pumpkin, and spices, poured the mixture into graham cracker crusts, and popped them in the oven.

They were incredible. Seriously. I like smooth-textured cheesecakes that aren't overly-cheesy. These little babies were perfect, IMHO. Very pumpkin-y, very smooth, not too dense or cheesy. One 4-inch cheesecake was the perfect size to split with Mr Minx.

I was so pleased with the results and the texture of the blended cottage cheese, I think I might try a version without using any cream cheese at all. Maybe even a smearcase-style cake. Maybe.

Mini Pumpkin Cheesecakes for Two
I call for a mini prep to whiz the cottage cheese because it seems silly to dirty a big food processor with this ridiculously small amount of batter. If that's all you have, however, then use it. A blender would work, too. I find the Cuisinart Mini-Prep's 3-cup size is just perfect for small jobs like hummus and pesto, and it's small enough to leave on the counter at all times. Amazon has it for around $35, and I have more than gotten my money's worth.

For the crust:
1/2 cup graham cracker crumbs (I used crushed Teddy Grahams)
2 heaped tablespoons toasted unsalted pumpkin seeds (pepitas), ground in a mini prep or with a mortar and pestle if you're old fashioned
Pinch brown sugar
1/4 teaspoon ground ginger
1/4 teaspoon ground cinnamon
1 tablespoon butter, melted

For the filling:
1 (5.3 ounce) container of Muuna lowfat plain cottage cheese
1/4 cup pumpkin puree
1/4 cup sugar
1/2 teaspoon ground cinnamon
1/4 teaspoon ground ginger
1/8 teaspoon ground allspice
1/8 teaspoon ground nutmeg
Pinch salt
1 teaspoon vanilla extract
6 ounces cream cheese at room temperature
1 egg

To make the crust: Preheat the oven to 350°F.

Place the crust ingredients in a zip-top sandwich bag. Close the bag and squish the ingredients around until everything is coated with the butter. Dump the bag into two 4-inch springform pans and pat into an even layer, coming a little up the sides. Bake for 7 minutes, then remove and allow to cool to room temperature.

To make the filling: Put the cottage cheese in the bowl of a mini-prep food processor and pulse until the cheese has been pureed. Add the pumpkin, sugar, spices, salt, and vanilla and blend well. Scrape mixture into a bowl and stir in the softened cream cheese, then beat in the egg until everything is well combined.

Pour filling into prepared pans and bake at 350° for 40-45 minutes, or until puffed and set. The middle might jiggle a wee bit but should not be liquidy. If it is, bake it for an additional 5 minutes. Cool cakes on a rack. When cool, loosen the edges with a knife before releasing the sides of the pan. Wrap and foil and refrigerate until cold.

Serve topped with whipped cream.

Serves 4

* Any products in this post that are mentioned by name may have been provided to Minxeats by the manufacturer. However, all opinions belong to Minxeats. Amazon links earn me $ at no cost to you! Please buy!

Follow on Bloglovin

Posted on Minxeats.com.

Friday, October 14, 2016

Thai Red Curry BBQ Sauce

It's football time again, and the Ravens have a ton of 1 pm games. I hate that. It really cuts into my ability to make interesting weekend food. You see, I only cook on the weekends (Mr Minx has weeknight kitchen duty) and I like to spread my prep and cooking out over a long period of time. If I spend a big chunk of the afternoon with my eyes glued to a football game, that gives me much less time for prep. So I tend to resort to either long-cooking recipes like chili or fast things like nachos, both of which are rather boring. To me, anyway.

I also like to make things like pulled pork. A pork butt has to cook for hours, so I pop it in the oven before gametime and by the time it's all over, the meat is ready for shredding. But I can't use bottled bbq sauce. I haven't really found one that I like. Most are too sweet, or too smoky. And I figure if I can't make an entirely inventive meal on Sundays, I can at least make one component from scratch. Like bbq sauce.

I like making sauces, and bbq sauce is easy if you have the basics: ketchup; onion; brown sugar; an acid. Mr Minx picked up a bottle of McCormick Red Curry seasoning recently, so I used it to make a Thai-ish bbq sauce. We already had fish sauce and lime juice on hand, so it was pretty easy to throw together and refrigerate before the game. Afterward, I shredded the boneless mini pork butt that was cooking in the oven and made a salad with a bag of broccoli slaw and leftover peanut sauce.

Easy, time efficient, and somewhat interesting. Oh, and tasty, which of course is the most important part.

Thai Red Curry BBQ Sauce
This sauce would also be a great glaze for chicken wings.

Olive oil
1/2 ripe bell pepper (I used yellow), roughly chopped
1 cup roughly chopped onion
Kosher salt
2 garlic cloves, crushed
2-3 teaspoons McCormick Thai Red Curry seasoning, or more to taste
Small handful torn cilantro
1/2 cup ketchup
6 ounces (1/2 12-oz jar) apricot preserves
1 cup low-sodium chicken broth or water
Juice of 1 lime
Fish sauce
Brown sugar

Heat a small amount of olive oil in a sauce pan and add the pepper, onion, and a pinch of salt. Cover pot and cook until vegetables are wilted, stirring occasionally, about 4 minutes. Add garlic and stir well to combine. Cook an additional minute until garlic is fragrant. Add a teaspoon of McCormick Red Curry seasoning to the pan and stir well. Add the cilantro, ketchup, preserves, stock or water, and lime juice and bring to a boil. Cook over medium heat until reduced and thickened to ketchup consistency. Season with additional 1 or 2 teaspoons of curry seasoning, and a few tablespoons of fish sauce. The sauce should be fairly tangy, but if you prefer a sweeter bbq sauce, add a tablespoon or so of brown sugar.

Remove from heat and blend to a fairly smooth puree with a stick blender. Alternatively, use a regular blender, but be very careful with blending hot liquids, as the heat buildup in the blender jar can cause the lid to pop off. Either let the sauce cool a bit, or take the center plastic cap off the blender lid and hold a kitchen towel over the lid while blending.

Store in a covered container in the fridge for up to one week. Makes about a pint.

Follow on Bloglovin

Posted on Minxeats.com.

Monday, April 25, 2016

Chile Chili

A few weeks ago, I realized that the entire winter had gone by without my making a batch of beef chili. While it is Spring (believe it or not), and chili might be thought of as cold weather food, cooking it up is a snap and it tastes fine all year long.

My preferred method of making chili involves chunks of beef, canned tomatoes, and no beans. This time, I went the opposite direction by using ground beef, no tomatoes (at least not many), and a can of black beans. Why? Because sometimes we need change in our lives. Change is good.

Beef and Black Bean Chili

4 New Mexico chiles
2.5 lb ground beef
1 large onion, chopped
2 teaspoons onion powder
1 1/2 teaspoons ground cumin
1 1/2 teaspoons ground coriander
1 teaspoon smoked paprika
1/2 teaspoon cinnamon
1/2 teaspoon oregano
2 cloves garlic, crushed
2 tablespoons tomato paste
1-2 chipotles en adobo, mashed
2 tablespoons cacao nibs, ground or 2 tablespoons cocoa powder
1 bottle beer of your choice (not too hoppy)
1 can black beans, drained and rinsed
2-3 tomatoes, diced (optional)
Sriracha
Lime Juice
Salt
Additional spices for re-seasoning
Grated cheese
Scallions or spring onions for garnish

Put the chiles and 1 1/2 cups water in a large glass bowl and cover with plastic wrap. Microwave on high for 5 minutes. Remove from microwave and set aside. If the chiles aren't submerged, put a small plate over to keep them under the water.

Cook the ground beef in a dutch oven, stirring regularly, until it begins to brown. Drain any accumulated fat, then add the onions to the beef in the pot. Cook, covered, 5-6 minutes until onions soften. Combine the next 5 ingredients in a small bowl. Once onions have softened, stir in the spices and cook an additional 1-2 minutes until fragrant. Stir in the garlic, then add the tomato paste, chipotles, and cacao or cocoa.

Remove the stems and seeds from the chiles put them in a food processor or blender with enough of the soaking liquid to make a puree. Add to the pot, along with the beer and the strained soaking liquid. Bring to a boil, then turn down to a simmer.

Cook, covered, for at least one hour, or until ground beef is tender. Add the beans and cook for an additional 15 minutes. Taste for seasoning and add sriracha, lime juice, and salt to taste.

Sometimes, when a dish like chili has been cooking for a long time, it needs a bit of re-seasoning. Add pinches more of cumin, coriander, and smoked paprika to taste.

Leftovers taste great on a hot dog.

Follow on Bloglovin

Posted on Minxeats.com.

Monday, October 26, 2015

Masala Mama

One of the many products we were introduced to by this summer's Fancy Food Show was Masala Mama spice mixes. The company puts out a whole line of individual spices, but they also do pre-measured dry mixes to make cooking Indian food at home super easy. They're not stupid simple though - one doesn't merely dump the contents into a pan a la Hamburger Helper. There are explicit instructions included along with multiple seasoning packets that get introduced at different points during cooking. So you learn a bit of technique while being mostly lazy.

For instance, the Goa Coconut Curry came with a packet of kokum (related to mangosteen and nothing that the average American home cook will find in the supermarket) that needed to be added to a can of coconut milk and heated. The dried pink fruit was then left to soak in the warm milk in order to impart flavor and color. While that was going on, a second package of spices was fried with onions to make the base for the dish.

Goa fish curry doesn't normally have a ton of vegetables in it, as pictured, but we had carrots and tomatoes and peas and not a whole lot of fish, so I tossed them in for both bulk and nutrition. The dish turned out really well, tasting a lot more like something that came from a restaurant than from my kitchen. We haven't had an opportunity to try the Vindaloo spices yet, as the first ingredient is "chiles" and I have no idea how hot it's going to be. Not that we dislike spicy food--on the contrary, we enjoy it--but I've heard stories about the heat levels that dishes like vindaloo can reach. It's for the American market though, so I suppose it can't be that mind-blowing.

Masala Mama, founded by chef Nidhi Jalan, is based in Brooklyn, NY. Their products are certified USDA Organic and come from artisanal farms in India. They also offer three gourmet simmer sauces (Goa curry, Tikka Masala, and Vindaloo), 10 spice kits in addition to the two above, three spice blends (Garam Masala, Tandoori Masala, and Magic Curry Powder) and over 30 organic individual spices. If you can't find them in your local Whole Foods, you can buy the spice kits online at http://www.masalamamaspice.com/organic-indian-spice-kits/.

* Any products in this post that are mentioned by name may have been provided to Minxeats by the manufacturer. However, all opinions belong to Minxeats. Amazon links earn me $! Please buy!

Follow on Bloglovin

Posted on Minxeats.com.

Wednesday, December 21, 2011

Pumpkin Fruitcake

I know a lot of folks don't like fruitcake. I don't either, actually, especially not the typical dyed cherry-filled abomination. But my Dad loves the stuff - plastic fruits and all - so I gave him rather fabulous home-made fruitcakes for the past two Christmasses in a row. He got one for his birthday this year, too, but it was a fruitcake in name only. A pumpkin bread studded with dried fruits and nuts, this moist creation was also a big hit.

Pumpkin Fruitcake, adapted from this recipe

1/3 cup butter, softened
1 1/3 cups sugar
2 eggs, beaten
1/4 cup water
1 cup canned pumpkin puree
1 2/3 cups flour
1 teaspoon baking soda
1/4 teaspoon salt
1/2 teaspoon baking powder
1/2 teaspoon cinnamon
1/4 teaspoon cloves
3/4 cup roasted unsalted nuts of your choice, chopped into rough chunks
3/4 cup dried fruits including figs, apricots, sour cherries, cranberries, raisins, chopped into rough chunks

Preheat oven to 350°.

In one bowl, cream butter and sugar. In another bowl combine eggs, water and pumpkin. Add butter mixture to pumpkin mixture and mix well. Stir together dry ingredients in a third bowl. Add about one-third of the dry ingredients at a time to pumpkin mixture, stirring well after each addition. Mix in nuts and dried fruits. Bake bread in greased 9x5x3-inch loaf pan for 60 to 75 minutes or until a toothpick poked into the center comes out with only a few dry crumbs attached.

Photo: © Poisson d'Avril/SoFood/Corbis 
Posted by theminx on Minxeats.com.

Thursday, September 01, 2011

Hurricane Cupcakes

So what's a girl to do when there's a hurricane barreling up the coast? Do some baking while the power's still on, that's what! We have a gas stove, so a power outage wouldn't really keep us from cooking, however, I'm not all that thrilled with the idea of manually lighting the oven as it fills with gas. Right. Anyhoo, I decided that we would need baked goods to munch while we played cards in the dark, so I whipped up a batch of cupcakes. I used my standard cupcake recipe, omitting the melted chocolate component and adding a bit of sweet spices. Not enough to make spice cake, mind you, just a bit to add a hint of flavor.

Fellow food blogger Nakiya, of Taste of Baltimore, had challenged me to make something with the Biscoff Spread I found at the new ShopRite in Timonium. Biscoff Spread, made from crushed Biscoff cookies, is predominately cinnamon flavored, so I thought it would make a great addition to the frosting for my lightly spiced cupcakes.

I suppose I should call these "Nakiya Cupcakes," even though it's probably not fair that she won't taste one. Not from this batch at least...the few that are left are quite stale. Next time!

Nakiya Cupcakes

1 cup flour
3/4 cup almond flour
1 tsp baking powder
1/2 tsp salt
1/2 teaspoon ground cinnamon
1/2 teaspoon ground cardamom
1/4 teaspoon ground cloves
1/4 teaspoon Chinese five spice powder
1/3 cup butter, softened
3/4 cup sugar
2 large eggs
1 tsp vanilla extract
1 cup almond milk (can use regular or soy milk)

Preheat oven to 325F. Line muffin pans with 18 cupcake liners.

In a medium bowl, whisk together the flour, almond flour, baking powder, salt, and spices.

In a large bowl, cream together butter and sugar until light. Beat in eggs one at a time, then add the vanilla extract. Alternate stirring in flour mixture and almond milk, ending with flour. Mix until no streaks of flour remain, but do not overmix.

Divide batter evenly into prepared muffin cups.

Bake at 325F for 20-23 minutes until a tester comes out clean and the tops spring back when lightly pressed with a fingertip. Cool on a wire rack.

Makes 18 cupcakes.


Biscoff Frosting

1 stick of room temperature butter
1/4 cup Biscoff spread
7 ounces marshmallow fluff
3/4 cup confectioners sugar
1/2 teaspoon vanilla extract
1/4 teaspoon salt

Combine the butter, Biscoff spread, and marshmallow in a bowl, and with a hand or stand mixer, beat on medium until completely smooth. Reduce speed to low and add confectioners sugar, vanilla, and salt. Continue to beat until smooth and fluffy. Distribute evenly among cupcakes using a pastry bag or, as I did, with a knife and spoon (was feeling lazy).

Posted by theminx on Minxeats.com.

Monday, December 20, 2010

Mocha Spice Biscotti

In their Holiday Cookie a Day slideshow, Bon Appetit featured a recipe for coffee-spice shortbread with crystallized ginger. While that combination of flavors intrigued me, I thought I might prefer to make similarly-flavored biscotti, instead. And while I'm all over coffee-flavored foods, might not a bit of chocolate make it just that much better?

In the end, I used David Lebovitz' recipe for chocolate biscotti as a starting point and used the flavorings from the shortbread recipe. The resulting cookies are the quite delicious Mocha Spice Biscotti, even better when dunked into a cup of hot coffee or cocoa.


Mocha Spice Biscotti

2 cups flour
1/2 cups cocoa powder
1 teaspoon baking soda
2 tablespoons finely ground coffee
1 teaspoon ground ginger
1 teaspoon ground cinnamon
1/2 teaspoon ground cardamom
1/4 teaspoon salt
3 large eggs, at room temperature
1 cup sugar
1 teaspoon vanilla extract
1/4 cup semi-sweet chocolate chips (optional)

Preheat the oven to 350F (180C) degrees.

Sift together the flour, cocoa powder, baking soda, salt, coffee, and spices.

In a large bowl, beat together the 3 eggs, sugar, and vanilla extracts. Gradually stir in the dry ingredients.

Line a baking sheet with a silicone mat (or parchment). Divide the dough (it will be sticky) in half, placing both halves on the baking sheet about 3" apart. Form each dough blob into a loaf about 9" long by 5" wide x about 1" high. Bake for about 25 minutes, until the dough feels firm to the touch.

Remove loaves from oven and cool for about 15 minutes. Using a serrated knife, gently cut loaves into about 1/2" slices. Lay the cookies cut side down on two baking sheets and return to the oven for about 20 - 25 minutes, turning them over at the halfway point.

When the cookies are cool, you can drizzle them with a bit of chocolate: melt the chips in a microwave-safe bowl for about a minute on high. Take them out every twenty seconds or so and give them a stir to see if they are melted. Once melted, spoon the chocolate into a small zip-top plastic bag, twist closed, and cut off one tip to make a piping bag. Pipe squiggles onto the cookies. Allow to cool until chocolate has hardened before storing cookies in sealed containers.

Makes about 30 cookies.

Friday, November 05, 2010

Foodie Book Review - Orchards in the Oasis

Orchards in the Oasis: Travels, Food and Memories
by Josceline Dimbleby
Quadrille Publishing Ltd. (currently available only in the UK)

Foodie memoirs are one of my favorite reads. I particularly love them if they have an exotic setting as they let this avid armchair traveler experience foreign lands merely by turning a page. Because of this, I jumped at the opportunity to read and review Josceline Dimbleby's memoir, Orchards in the Oasis, in which she paints charming portraits of the many countries she's visited over her lifetime. Her reminiscences of trips to Peru and to Burma, to Morocco and Damascus, bring the sights and sounds - and flavors - of these countries to life.

One of my favorite chapters is the one on Persia, entitled The Road to Yazd. In it her descriptions of the country - still under the rule of the Shah - make it seem downright welcoming to Western visitors. She even gets to visit a rather sacred and off-limits Zoroastrian "Tower of Silence" where the people of this faith disposed of their dead, even into modern times.

Even the not-so-exotic passages in the book, detailing time spent in the Southwest of England and in London, are nonetheless full of engaging charm. I want to visit these places of which she speaks, and particularly to taste the food she's eaten. And I can. Blessed with a fine palate as well as a good memory, Dimbleby has been able to create interpretations of dishes she enjoyed during her travels and has included the recipes in the book, accompanied by gorgeous color photographs. The ones I find most interesting are her Crispy Pigeon Pie, inspired by Moroccan bstilla, and a Peruvian Beef in Chilli and Chocolate Sauce.

Overall, I enjoyed the journey on which I traveled with Ms Dimbleby, not without a little jealousy at her many excursions to countries I'll likely never visit on my own. And I plan to try at least a few of the recipes...maybe this weekend.

Thursday, May 20, 2010

Product of the Week - Smoked Paprika

Smoked paprika has become quite the trendy ingredient of late. More and more I see it being called for in recipes by TV chefs and in cookbooks and food magazines. While pimentón is not such an exotic ingredient in Spain and around the Mediterranean, up until fairly recently it wasn't easy to find on American supermarket shelves. I originally bought mine from Penzeys, but have since found McCormick and Spice Island brands at the Superfresh or Giant.

Before trying it, I didn't know what the fuss was all about. I always thought standard paprika - the kind one sprinkles on top of devilled eggs as a garnish - had little or no flavor. Smoked paprika, on the other hand, lends a lively and of course smoky flavor to food. I like to put it on basically everything, because, like everyone's favorite similarly smoky-flavored pork product (that would be BACON), it's good in everything. Sure, put it on devilled eggs, and in egg salad. But it's great in chicken salad, in chili, and in a dry rub for ribs or steak or shrimp. Or vegetables. Anything that calls out for a bit of smokiness.