Showing posts with label mango. Show all posts

Thursday, July 06, 2023

Sayso Cocktails

Last Summer's Fancy Food Show in NYC introduced me to several new favorites, one of which is Sayso Cocktails.

I am a big fan of mixed drinks but I'm usually too lazy to make one at home. I'll toss stuff together without measuring--various liqueurs that are on hand, some juice, seltzer--and end up with something quaffable, but not worth remaking. (I will never claim to have any mixology talents.) Sayso lured me immediately with the ease of making a tasty cocktail with only three ingredients: a Sayso "tea bag" (which I prefer to call a "sachet,"), water, and alcohol. The sachet contains all-natural flavorings and a blend of no-aftertaste low-calorie sweeteners that turn water into the cocktail mixer of your choice. You can stop right there, adding a bit more water and ice to your glass and enjoy it a mocktail, or you can add your favorite hooch. Sayso comes in four flavors so far: rosemary honey moscow mule, old fashioned, skinny cardamom paloma, and skinny spicy margarita.

Cocktails can be super sweet, but Sayso drinks are not. If you like sugar, you can certainly add some simple syrup to taste! You can also use Sayso as a starting point and create variations on a theme. For instance, when I remembered we had a container of Talenti Mango Sorbetto in the freezer, I realized I could make a spicy mango margarita. 


Spicy Mango Margarita

1 sachet Sayso skinny spicy margarita
4 ounces warm water
2 ounces blanco tequila
1/4 cup Talenti mango sorbetto
Ice
Seltzer (I used a tropical fruit-flavored one)
Fresh Mint

In a highball glass, steep the sachet in the water for 5 minutes. Wring all the goodness out of the sachet and discard. Add the tequila and sorbetto and give it a stir. Add a few ice cubes and top with a splash or two of seltzer. Garnish with fresh mint.
------------------------------------------------

I prefer the old fashioned and Moscow mule flavors in the colder months, when I'm more likely to drink brown liquor like bourbon and dark rum. But all four flavors are great any time of the year.

Order Sayso directly from the company, or from Amazon. I received samples of all four varieties from the company, but I will definitely be purchasing these again, particularly the spicy marg version. 

* Any products in this post that are mentioned by name may have been provided to Minxeats by the manufacturer. However, all opinions belong to Minxeats. Amazon links earn me $! Please buy!

Posted on Minxeats.com.

Tuesday, November 02, 2021

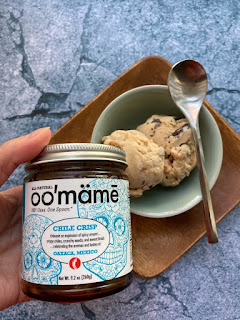
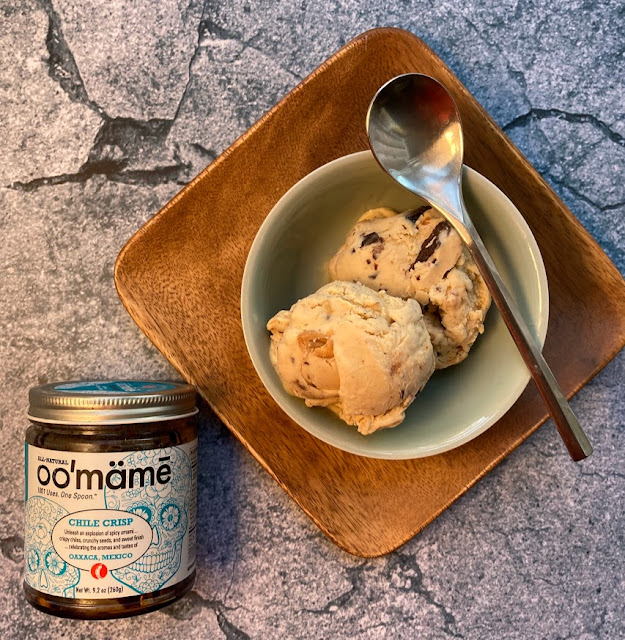
Oomame Chile Crisp Ice Cream

Moroccan Oomame on Oatmeal with feta
One of my favorite products discovered at the 2021 Fancy Food Show was Oomame's line of globally-influenced chile crisps. Originally from China, chile crisp has become a popular condiment among chile-heads and others who enjoy a flavorful bit of spice plus crunchy texture. It's great on dumplings, but also pizza, pasta, and just about everything else. What I like about Oomame's product is that it comes in four varieties - a classic Sichuan style, plus others borrowing flavor profiles from Mexico, Morocco, and India. While I still like to use the Sichuan version on typically savory dishes, I have found that the dried fruits in the other varieties (fig in Moroccan, papaya in Indian, mango in Mexican) add a subtle sweetness that makes them also work well with foods that are traditionally sweeter. Try a drizzle of Moroccan Oomame with a sprinkle of feta cheese on your next bowl of oatmeal--rather than the usual brown sugar or maple syrup and fruit--for something totally unexpected and totally delicious. But let's push that proverbial envelope a bit, shall we?

Some ice cream shops in Sichuan province have taken to drizzling chile oil on vanilla soft serve. And while a chile crisp sundae seems like a fine idea, I took it even further by putting chile crisp in ice cream. Yes, I did! The Mexican-inspired version of Oomame Global Chile Crisp, in particular, seemed ripe for taking a savory condiment fully into dessert territory. But rather than using vanilla in my frozen confection, I borrowed some elements from the chile crisp itself to flavor the creamy base. I started with Jeni's ice cream recipe, which uses corn starch and cream cheese in place of eggs as a thickener, and infused it with mango and orange peel, adding peanuts as a substitute for the pepitas in the Mexican Oomame. (While they're great for crunch, I didn't think they'd add all that much flavor.) 

The result exceeded my wildest expectations. Mr Minx wasn't all that thrilled with the flavor of dried onion in his ice cream but it didn't bother me. Nor did the occasional hit of cumin. The predominant flavor was orange peel, even more so than chile, which I thought was enough to keep my creation well within the realm of dessert. If you're an adventurous eater, give it a try. 

I have no regrets.


Oomame Chile Crisp Ice Cream

1 clementine or half a small orange
2 cups milk
1 1⁄4 cups heavy cream
1 ounce dried mango strips
Small handful of roasted unsalted peanuts
4 t cornstarch
2⁄3 cup sugar
2 T light corn syrup
1⁄4 t kosher salt
3 T cream cheese, softened
2 T Oomame Mexican Chile Crisp
Additional roasted unsalted peanuts
Chocolate chips (optional - I used a Seattle Chocolates Mexican Chocolate bar, cut into slivers)

Peel the clementine or orange in large strips, saving the fruit segments for another use. Carefully scrape the white pith from the inside of the peel with a small knife. 

Reserve 1/4 cup of milk and put the remaining 1 3/4 cups plus the cream into a 4-quart saucepan. Add the mango, peanuts, and clementine or orange peel. Over medium-high heat, bring the milk to almost a boil. Turn off the heat, cover the pan, and allow the flavorings to steep for about 20 minutes. 

Stir the cornstarch into the reserved 1/4 cup of milk and set aside. 

Strain the steeped milk into another 4-quart saucepan, reserving the fruit and nuts. Add the sugar, corn syrup, and salt to the pan and bring the milk to a boil over medium-high heat. Cook for 4 minutes, then stir in the slurry. Bring back to a boil and cook until thickened, 2 minutes.

Put the cream cheese in a large bowl and pour in 1/4 of the hot milk, whisking until smooth. Carefully whisk in the rest of the hot milk. Stir in the chile crisp. Pour the milk into a storage container. Add a layer of ice cubes to the bottom of a baking pan large enough to fit the storage container and put the container on top of the ice in order to cool the milk mixture down quickly. After about 15 minutes, put the container in the fridge to chill completely, 4 hours or overnight.

Cut the steeped mango and orange peel into small pieces and reserve along with the peanuts.

Put the chilled ice cream base into the bowl of an ice cream maker and process according to manufacturer's directions. After the ice cream has started to thicken and is almost done, add the mango, orange, peanuts, and chocolate, if using. Scoop ice cream into a freezer-safe storage container (I just used the same one I used for the hot milk) and smooth with the back of a spoon. Cover and freeze until firm, at least 4 hours.

Serve with additional chile crisp, or over your favorite brownies. Or eat straight out of the container.


* Any products in this post that are mentioned by name may have been provided to Minxeats by the manufacturer. However, all opinions belong to Minxeats. Amazon links earn me $! Please buy!

Posted on Minxeats.com.

Monday, September 02, 2019

Wholesome Pantry Snacks

I've really tried to be good this summer, eating whole foods and skipping things like sugar and grains, eating way more fruit and veg, and laying off the meat. Many people who do this go on forever about how good they feel, how well they sleep, poop, etc., because they're living this new somehow more perfect lifestyle. I won't. I feel as good as I ever did (I never felt bad, physically), but I've lost some weight, which is a plus. (I've always carried way too much weight for my medium-sized frame.)

Even those of us who are seemingly virtuous in our eating habits need to snack once in a while, especially when we're out and about doing summertime activities. Generally, when I feel snacky, I reach for dried fruit, nuts, and granola. My number one favorite dried fruit is mango. It's fabulous, chewy and sweet, and comes in pieces big enough that two or three makes an adequate nibble. So when I was offered a selection of snacks from ShopRite's Wholesome Pantry Organic line, and they included dried mango, I jumped at it. Besides, we shop at ShopRite regularly; it is honestly one of my favorite grocery stores.

Raw cashews are also a great snack, but they can also be transformed into stuff like cashew milk and cheese substitutes. And if you prefer toasted cashews, just toss them in a heavy dry skillet over medium heat and cook for a couple of minutes until fragrant and lightly browned. Shake the skillet regularly and don't walk away from the pan--nuts are high in fat and can burn easily!

Wholesome Pantry Organic's sweet potato tortilla chips are so good! They're great with salsa, but perfect just on their own straight from the bag (my preferred method of snacking). And if you're feeling particularly naughty, they're also just lovely popped into the toaster oven with a sprinkling of grated cheese on top.

Those granola squares in the photo? Yeah, they're a smart snack for summer, but I ate one for lunch the other day (had a big breakfast) with a piece of fruit and it kept me satisfied until dinner.

The Wholesome Pantry Organic line consists of USDA-certified organic items, and "free-form" products made with simple, clean ingredients. Check them out next time you're in ShopRite--you'll find the products in every aisle, from fresh veg to meats to sauces.

* Any products in this post that are mentioned by name may have been provided to Minxeats by the manufacturer. However, all opinions belong to Minxeats. Amazon links earn me $! Please buy!

Posted on Minxeats.com.

Monday, September 18, 2017

Chocolate Strawberry Naked Cake

Sometimes I am too ambitious for my own good. I've never been much of a baker, excepting the occasional tray of brownies and cookies at Christmastime. There's also the annual cake for Mr Minx's birthday, but that's usually a simple chocolate bundt. This year, I wanted to do something fancier. I was desperate to make a "naked cake," a cake with exposed layers, popularized by Christina Tosi at NY's Milk Bar. I've seen a lot of them on Instagram, and they look so cool. Also, they didn't seem all that difficult to make. Frosting the sides of the cake always seemed like the most fidgety part, and making a cake naked eliminates that whole messy ordeal.

My idea was to use the same super moist recipe that I use for the bundt cake, with the addition of roasted strawberries, and a simple stabilized whipped cream frosting. It would be like a strawberry shortcake, only not short and with the added goodness of chocolate.

I didn't want to attempt to cut round cake layers in half horizontally, pretty sure that would be a disaster. Instead, I made several flat rectangular cakes in a jelly roll pan and cut them into rounds. That ended up looking a bit sloppy. Perhaps my knife wasn't sharp enough, or the cake recipe I used was too moist. In any case, the somewhat jagged layers got stacked between pieces of waxed paper and spent the night in a cake carrier until I was able to assemble it the next day. It would have been too much to try to get it all done on Saturday morning before our annual afternoon birthday crab feast guest arrived.

The roasted strawberry idea I got from a foodie newsletter. The recipe in the newsletter was actually for oven-dried berries, but I liked the idea of cooking strawberries in the oven until they got soft and gave up a lot of liquid. Some of that liquid became a subtle flavoring for the whipped cream frosting that I stabilized with gelatin so it would last longer and not weep all over the cake.

I had used up all the strawberries in the roasting process but wanted to top the cake with something besides whipped cream. Birthday candles were out of the question (as was singing "Happy Birthday"), but I remembered we had a bag of Crunchies freeze-dried strawberries that the company sent me to taste after the Fancy Food Show. I had been nibbling them on their own, but felt they would be the perfect garnish for this cake and a good counterpoint to the squishy roasted berries between the layers. They stood up like sweet stalagmites, adding height as well as color and flavor. They softened a bit as the cake stood, but they never sagged, and I kinda liked the third strawberry texture in the mix.

Crunchies are non-GMO, gluten-free, vegan, kosher, and halal and contain no added sugar or artificial flavors. They are just freeze-dried fruit, pure and simple. I also love the Crunchies mango snacks and am contemplating making a similar cake, with yellow cake and mango filling, so I can use them as a garnish, too. That is, if we don't just eat it all straight out of the bag. :)

For someone who didn't really know what she was doing, I did a pretty decent job. Though the cake isn't the most beautiful thing in the world, it tasted so so good. ::::patting self on back:::::

Chocolate Strawberry Layer Cake

For the roasted strawberries:
2 pounds strawberries, hulled and halved, quartered if large
1/4 cup sugar
1 teaspoon vanilla extract

For the chocolate cake:
1 cup unsalted butter
1/3 cup cocoa powder
1 teaspoon kosher salt
2 tablespoons liqueur of your choice (I used Kahlua)
2 cups all-purpose flour
1 3/4 cups granulated sugar
1 1/2 teaspoons baking soda
2 large eggs
1 cup sour cream
2 teaspoons vanilla

For the frosting:
2 teaspoons unflavored gelatine
2 cups heavy cream
1/4 cup confectioner's sugar
1 teaspoon vanilla extract

Garnish:
Crunchies freeze-dried strawberries

To make the strawberries: Preheat the oven to 400°F.

Toss the strawberries with the sugar, then with the vanilla. (Don't put the vanilla on the sugar to cut corners; it will just make the sugar clump up and make it hard to toss with the strawberries. No, I did not learn that through experience.) Spread in one layer on a parchment-lined baking sheet. Roast for 25-30 minutes, until strawbs are soft and there's lots of yummy juice on the baking sheet. Allow to cool at room temperature before scraping into a covered container and refrigerating until completely cooled.

To make the cake: Preheat oven to 350°F. Place a layer of parchment in a jelly-roll pan and grease it lightly with butter.

Combine the butter, cocoa, salt, and 1 cup of tap water in a saucepan over medium heat. Cook only until butter is melted and mixture is completely combined. Stir in the liqueur.

Place the flour, sugar, and baking soda in a large bowl. Pour in the chocolate butter mixture in 2 or three batches, stirring between each to combine. Beat the eggs with the sour cream and vanilla and stir into the flour mixture. Whisk until fully incorporated.

Here's the tricky part. Depending on the size of your pan, ladle in enough batter to cover the parchment entirely and be no more than 1/2 inch deep. Bake for enough time that the cake springs back when you touch it. I used a 9" x 13" jelly roll pan, which made three cakes with the amount of batter specified, each baking from 13-15 minutes (the first cake took longer and the last cake took less time). An 12" x 17" pan or thereabouts would probably take 18-20 minutes, so start checking at the 16 or 17 minute mark. Just looking at it should tell you if the middle is wet or cooked through. Once your cake or cakes are baked, allow them to cool in the pan for a few minutes. Loosen the edge of the cake with a knife and turn out onto a rack to cool completely. You should peel off the parchment while the cake is still warm.

Once the cakes are cool you can cut them. If you want to make it really easy on yourself, cut each cake in half and make a square layer cake. (Next time, that's what I'm doing!) But if you want a round cake, use a 7" or 8" round template as a guide. Place each cooled cake on a cutting board large enough to hold them, or right on your counter or table if that's easiest. Using the template and a sharp knife, cut your circles. Lift them away with a large spatula and put them on parchment or waxed paper until you're finished cutting. The scraps can be eaten as a cook's treat, or put them in a plastic bag and freeze them for when you're having a cake craving.

To make the frosting: Remove 3-4 tablespoons of the strawberry roasting liquid to a bowl. Sprinkle the gelatin over the liquid and allow to rest for several minutes until set. If your strawberries didn't give off much liquid for some reason (perhaps because you ate it as you scraped it off the pan), use a few tablespoons of water instead.

Place the cream, sugar, and vanilla in the bowl of a stand mixer (or a regular bowl, if you're using a hand mixer) and beat for a minute or so. Put the gelatin in the microwave for about 10 seconds to liquify (it might take 15 seconds). Stir well so there are no clumps of gelatin, and with the mixer running on a fairly low speed, v e r y slowly drizzle it into the cream, beating all the time. Once incorporated, turn the mixer speed up and beat until medium peaks form. Don't overbeat, or you'll have butter. Scrape the cream into a piping bag fitted with a large star tip, or the tip of your choice.

To assemble the cake: Place a round of cake onto a cardboard cake round or on an aluminum-foil covered springform or tart pan bottom of appropriate size. Eyeball the strawberries. Do the pieces seem too big? Then chop them up a bit. Maybe you should just chop them up a bit anyway. Spread an even layer of strawberry pieces + some of the cooking liquid on the cake. Pipe on a layer of the cream, then top with another cake layer. Add another layer of cream, then another layer of cake. Top this third layer of cake with more strawberries and more cream. (You won't use all the strawberries. Eat them with ice cream or with a spoon.) Add the fourth layer of cake and pipe the frosting decoratively on top. Refrigerate cake until ready to serve.

Garnish with freeze dried strawberry pieces before serving.

* Any products in this post that are mentioned by name may have been provided to Minxeats by the manufacturer. However, all opinions belong to Minxeats. Amazon links earn me $! Please buy!

Follow on Bloglovin

Posted on Minxeats.com.

Friday, August 21, 2015

Fatty Crab

I'm occasionally amused by the way restaurants view themselves. Fatty Crab, a Malaysian-influenced restaurant owned by a non-Malaysian, Zak Pelaccio, seems to think it's a "joint." The Web site makes the place seem really funky, but it's just a small Meatpacking-district restaurant with tall front windows and a menu with lots of interesting and tasty stuff on it. Maybe we ate early, and the funky/joint stuff happens after dark. I'll never find out, nor do I particularly care. I have never been a scenester, so vibe isn't nearly as important as the food, and the food was good.

My semi-regular NY dining companion, David, and I chose to split three apps and one entree. We got the green mango and papaya salad, which was the typical Thai-style salad with chili, lime, and peanut. It was tasty, but not the best version I've had. The mango wasn't particularly green, but it was appropriately fiery.

Next up were pork belly buns served with a sriracha soy sauce and a cilantro salad. These were really nice, with tender fatty pork and nicely pillowy buns. The pork was flavorful enough without needing the sauce, and the cilantro salad added a bit of herbaceousness to cut the fat.

Not to be redundent, but we also tried the Fatty Sliders, made from a blend of beef and pork with sambal aioli and caramelized onions on potato rolls. The aioli was incendiary, but the burgerettes are something I'd love to replicate for one of summer's many grilling occasions.

Finally, we had the beef rendang, which was gorgeous. Short ribs had been braised forever in a mild lemongrass chili sauce and served with coconut rice and a side of pickles. So much better than the local version I had earlier in the year, I wished I didn't have to share this dish with someone else.

We didn't order dessert, but were brought little squares of sweet glutinous rice cakes, which were delish.

There are lots of other interesting items on the menu, including chili crab (with Jonah or snow crab, at either 45/60 bucks - a little rich for my blood) a clay pot chicken, a Malaysian fish fry, and Szechuan pepper lobster.  Maybe next time I'll splurge.


Click to add a blog post for Fatty Crab on Zomato

Follow on Bloglovin

Posted on Minxeats.com.

Friday, October 03, 2014

Gluten-Free Mango Lychee Crisp

One evening after dining at Hunan Taste, we popped into H Mart (since it's in the same shopping center) and picked up a few odds and ends from the produce department. There was a big bin of lychees that was being swarmed by women who seemed to be digging around for particular fruits. I had no idea what they were looking for, but put ten or so lychees in my bag and left them to their digging.

Lychees are weird fruits. When I was a kid, they were occasionally served as dessert in Chinese restaurants. They came straight from a can, preserved in syrup. They were oddly eye-ball-like and had a strange fleshiness. I wasn't sold.

Fresh ones are better. They're small and spiky, easy to peel, with a white fruit (and pit) inside. Still on the eyeball-ish side. I bought them green, which is apparently immature, although they were plenty sweet and juicy already. The texture of the fruit is similar to that of a grape, but more, I don't know...sinewy? Fibrous, I guess. The flavor is not far off from that of passion fruit and is very perfum-y. They're tasty, but I'm not big on the texture.

I had a mango left over from my Ananda chutney experiment and thought I'd make a fruit crisp with the mango and the lychee. Why not? It actually worked really well, especially with a scoop of ice cream on top.

You might have noticed the "gluten-free" label in the title of this post. I'm not going all special-diet on you, believe me. I still like gluten and eat plenty of it. But I figured I could use oat flour along with the oatmeal and make a gluten-free crisp as tasty as one with wheat flour.

Because lychees are oddly fibrous, it's best to chop them fairly finely. They are also juicy as heck, so make sure you add those juices to the crumble. You can sop 'em up with some cornstarch so the resulting crisp is actually crisp and not soggy.

Gluten-Free Mango Lychee Crisp

1 ripe mango
10 lychees
2 teaspoons sugar
1 tablespoon cornstarch
1/2 cup oatmeal
1/4 cup oat flour
1 tablespoon roughly chopped nuts (I used pistachios and walnuts)
1 tablespoon brown sugar
Pinch cardamom
Pinch cinnamon
Pinch salt
1 tablespoon butter, melted

Preheat oven to 375°F.

Peel and dice the mango. Peel, deseed, and chop the lychees finely. Toss the mango, lychee, and lychee juices with the sugar and cornstarch and divide the mixture between 4 half-cup or 2 one-cup oven-safe ramekins.

Combine the oatmeal, oat flour, nuts, brown sugar, and spices in a bowl. Pour over the melted butter and mix well. Sprinkle the oat mixture evenly over the mango/lychees.

Place ramekins on a baking sheet and bake for 30 minutes, until bubbly around the edges. Allow to cool a bit before eating.


Follow on Bloglovin

Posted on Minxeats.com.

Friday, September 12, 2014

Mint-Cilantro-Mango Chimichurri

Our visit to Ananda, an Indian restaurant in Maple Lawn (Howard County), introduced us to a variation of the beloved coriander chutney served with samosas and other fried appetizers. There, cilantro is combined with mint, mango, and avocado, giving it both richness and sweetness. I decided I wanted to make this at home and put in an inquiry to the restaurant. By the weekend, I hadn't received the recipe, so I tried to recreate it.

It's hard to find ripe avocados at the last minute, so I omitted them. While the result doesn't taste exactly like the stuff at the restaurant, it's pretty good. But what to put it on? I've been contemplating making samosas for a while now, but not that particular weekend. I did have a nice London broil defrosting though, and beef is great with a chimichurri sauce. And chimichurri is basically herbs + garlic + oil + vinegar. So I added oil and vinegar to some of the existing chutney, and it was great.

Mint-Cilantro-Mango Sauces

For chutney:
1 cup mint leaves, loosely packed
1 cup cilantro leaves and stems, loosely packed
1/2 mango, chopped
1 clove garlic, chopped
2 jalapeno peppers, seeded and chopped
Generous squeeze of lime juice
Pinch salt

For chimichurri:
3 tablespoons mint-cilantro-mango chutney
3 tablespoons red wine vinegar
3 tablespoons olive oil
Pinch cumin
Pinch salt

To make chutney: Place all ingredients in a food processor and blend to a puree. Add more salt to taste.

To make chimichurri: combine all ingredients in a bowl. Season to taste.

Follow on Bloglovin

Posted on Minxeats.com.

Friday, June 17, 2011

"Tartar" Sauce

While in a recent Indian food mindset, I thought I'd play around with adding Indian flavors to a local specialty - the crab cake. I've had varying success with adding non-traditional flavorings to a mound of fried crab meat but ultimately I think I prefer the tried and true - Old Bay. So rather than noodle around with the main event, I thought I could come up with an alternative to the ubiquitous tartar sauce.

Is tartar sauce a speciality of the Tartar people? Is it related to steak tartare in any way? Who knows?  Who cares? Whatever the origin, I think it's mayonnaise-y quality works well with fried seafood. For my Indian-esque version, I added sour cream to mayo and stirred in odds and ends gleaned from the rather large condiment collection in my fridge. The result - a bit spicy, a bit sweet, and very creamy - was a perfect accompaniment to even a classic Old Bay-spiced crab cake.

Indian-esque "Tartar" Sauce

3 tablespoons sour cream
1 tablespoon mayonnaise
1 tablespoon mango chutney
2 teaspoons garlic relish
1 teaspoon chopped cilantro
1 teaspoon chopped scallion
1 teaspoon fresh lemon or lime juice
salt to taste

Mix all ingredients in a small bowl. Chill for at least an hour to blend flavors. Serve with crabcakes or fried fish.

Posted by theminx on Minxeats.com.

Tuesday, March 09, 2010

Product of the Week - Gold Key Dried Mangoes

I am a big fan of the mango. Because I am allergic to peaches, they are the next best thing, texture-wise, and of course they have a magnificent flavor all their own. I like dried mangoes too, but as with all dried fruit, the quality varies from manufacturer to manufacturer. Some are too dry, some are too stringy. Others don't have the right balance of sugar to natural tang. But I picked up a package of Gold Key brand at an Asian food store a few years ago and found my holy grail of dried mangoes. These are sweet and tangy (more sweet though, which is my preference) and taste of exactly what they are - mangoes. I love them and have to be careful not to scarf down the entire package at one time!

I'm sure they're good chopped up and added to quick breads and cereals and the like, but I just like to eat them as is. Like candy. Yum.

Ok - get this package away from me before I eat them all....

Photo cribbed from Asia Finest Discussion Forum.